
12 Home Safety Products for Women Living Alone (Must-Have)
The home safety products women living alone actually need, organized by what matters most. Honest picks, real prices, and the ones worth skipping.
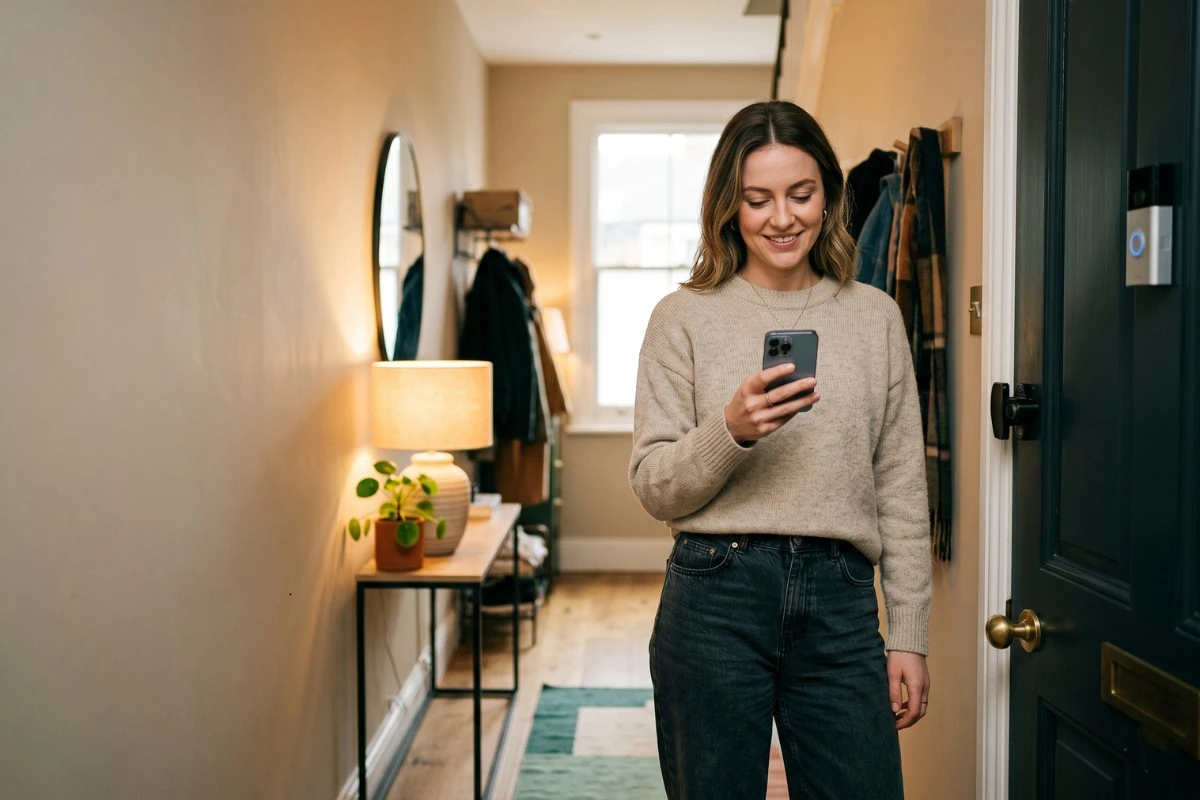
When I moved into my first solo apartment, I did what everyone does.
I opened Amazon, typed “home safety for women living alone,” and added everything in the top ten results to my cart.
Pepper spray. A baseball bat. A fake TV light. Two different door alarms. Spent close to $400 in one weekend.
Three months in, I realized something kind of embarrassing. I wasn’t using half of it. And the two things that actually made me feel safe in my apartment? They cost me $18 total.
So before we get into the products, let me show you the framework. Because the data on home break-ins is honestly nothing like what most of us picture.
Here’s what’s actually true:
- About 72% of burglaries happen when nobody is home. Not at 2 AM with someone creeping through your window. When you’re at work, at the gym, picking up groceries.
- 58% of home invasions happen during the day, usually between 10 AM and 3 PM. The “scary nighttime intruder” picture in your head is statistically the least likely scenario.
- And homes without any visible security system are 300% more likely to get broken into, because the easiest target is always the one that looks easiest.
Read that again.
The biggest threat to a woman living alone isn’t a stranger picking her at random in the dark. It’s her EMPTY apartment, in the middle of the day, looking exactly like every other empty apartment on the block.
That changes what you need to buy.
The 4 layers (this is the whole framework):
- Look occupied: so you don’t get picked in the first place
- Know what’s happening: see them before they reach you
- Slow them down: buy time if they try to get in
- Be ready: get help fast if something actually happens
Pick one solid product per layer, and you’re more prepared than 80% of solo women out there. I’ll show you exactly what I use, what to skip, and roughly what you should pay.
There’s also a little picker tool later that’ll match products to your specific apartment if you don’t want to read the whole thing.
Let’s start with the highest-leverage layer.
Layer 1: Make Your Home Look Occupied
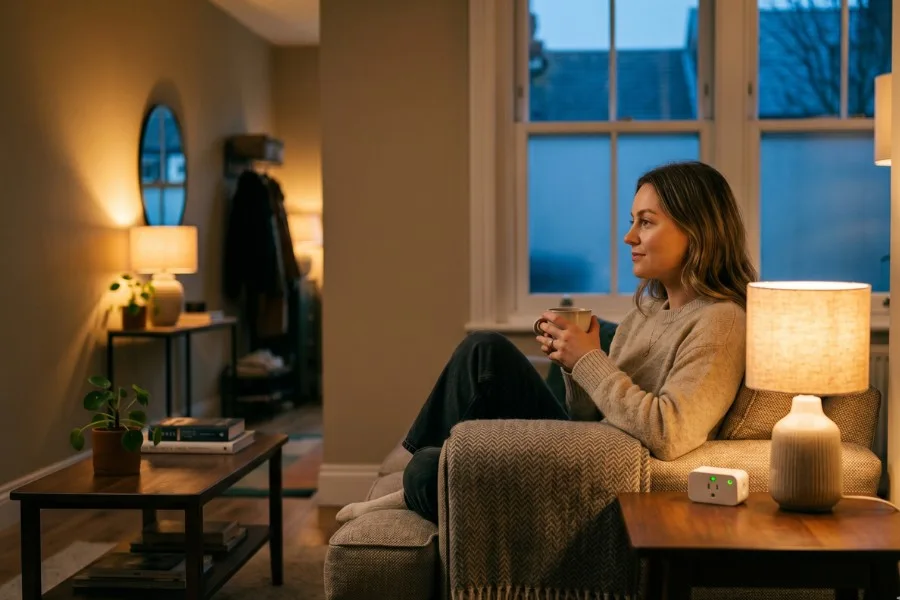
This is the layer most women skip, and honestly, it’s the one I’d buy first if I had to start over.
Your job in this layer is to make your apartment look like a normal, lived-in space, even when you’re not there. That’s it.
You don’t need a fortress. You need a place that looks boring and occupied, so the person scoping the building moves on to someone else.
Here’s the thing nobody mentions.
According to one study cited by The Zebra, 83% of would-be burglars check for signs of an alarm or activity before attempting a break-in.
They are literally looking for the easiest house. The bar to clear is low. You just need to not be it.
There are two products that do this job well, and you really only need one.
1. Smart plug + a lamp you already own
This is what I actually use. Two cheap smart plugs, two lamps I already had in my apartment, two staggered schedules in the app.
Living room lamp turns on at 6:45 PM and off at 11:15. Bedroom lamp turns on at 9:30 PM and off at 12. From the outside, my apartment looks exactly like someone is home and going about their evening.
I went with the Kasa Smart Plug 2-pack because it doesn’t need a separate hub, and the app lets you set random timing, which is the part that actually matters.
Lights coming on at exactly 7:00 PM every day looks like a timer. Lights coming on between 6:38 and 6:52 look like a person.
A few weeks after I set mine up, I came home one evening, and my upstairs neighbor stopped me in the hallway. She said, “I always see your lights on when I come home, do you work from home now?” I had been at the office that whole day. That was the moment I knew it was working.
I have this — See on Amazon
What to look for when you’re shopping:
- Look for “schedule” plus “randomize” or “away mode” features. Schedule alone isn’t enough.
- Make sure it works on 2.4 GHz WiFi (most apartment routers default to a mix, but smart plugs almost always need 2.4 GHz).
- UL-listed for safety. This is the small print that matters because the plug is going to be on for hours every day.
- Skip anything that requires a paid subscription. Smart plugs should be a one-time purchase.
Who should skip this:
- If you already own smart bulbs.
- If you live in a studio with one main light source and that light is visible from the street, one plug is enough. You don’t need a 2-pack.
Roughly what you should pay: $10–$15 for a 2-pack. Anything over $25 for two indoor plugs is overpriced.
2. Fake TV light
This is the one everyone hypes on safety listicles, and I want to be honest with you about it. It works, but it only works in a really specific situation.
A fake TV light is a small device that flickers like a TV screen.
From outside, someone walking past your window sees the blue glow and assumes you’re inside watching Netflix. The whole point is the outside view, which means it only works if:
- You have a window that faces a sidewalk, street, or walkway where people actually pass by
- You’re on a ground floor or low floor where someone can see your window from the street
- You leave the curtains slightly open so the glow is visible
If you’re on the 4th floor of an apartment building with no visible window from the street, a fake TV light does basically nothing. It’s flickering for no one.
For the women it does fit, this LED TV Simulator is the standard pick. It runs about 7 watts and has a sleep timer, so it auto-shuts off after 4 or 7 hours. Set it on the windowsill in your living room, set the timer, and it does its thing.
This one’s worth it — See on Amazon
Who should skip this:
- Anyone above a 2nd floor in a multi-unit building
- Anyone whose windows don’t face a public walkway
- Anyone who already has smart plugs running lamps (this is doing the same job, just slightly worse)
I had one for about six months. Mine sat unused in the closet because my apartment is on the 3rd floor, and the only window that faces the street is the bathroom.
Returned it eventually. Just being honest.
The honest takeaway for Layer 1
If I had to pick one product for this layer, it’s smart plugs every single time. They work for every floor, every layout, every situation. Fake TV lights are a niche product that gets oversold by listicles. Get the smart plug 2-pack, set two lamps on staggered schedules, and you’ve covered the highest-leverage layer of home safety for under $15. That’s it.
Layer 2: Know What’s Happening Around You
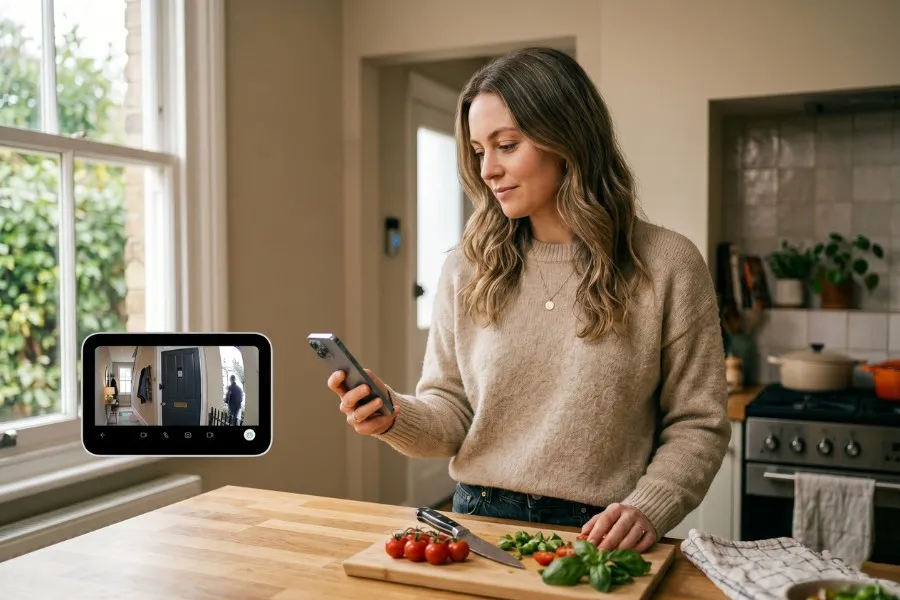
Layer 1 stops you from being targeted in the first place. Layer 2 is for when someone gets close anyway.
The whole point is to see them before they reach you, so you have a few extra seconds to decide what to do.
Here’s something that genuinely changed how I thought about home safety.
According to the Bureau of Justice Statistics, in 40% of unlawful entries to unoccupied residences, offenders gained access through an open door or window.
They didn’t even need to break anything. They just walked up, tried the handle, and walked in.
That’s the part that haunts me.
Most break-ins aren’t a movie scene. They’re someone testing your door at 2 PM while you’re at Trader Joe’s. If you’d seen them on a camera or gotten a phone notification when they touched your door, you would have known.
This layer has three products. You probably need two of them.
3. Video doorbell
If I could only buy one thing in this entire guide, it’s this.
A video doorbell is the single highest-impact product for a woman living alone. Here’s why.
- It does four jobs at once:
- It tells you who’s at your door without you having to open it
- It records when someone approaches, even if they don’t ring
- It lets you talk through it from another room or another city
- And just having the camera visible deters most casual attempts before they happen
I had a moment about a year into living alone that sold me on this product permanently. I was making dinner around 7 PM, and my doorbell app pinged me. I checked my phone, and there was a guy I didn’t recognize standing at my door, not ringing, just standing there. He looked at my doorbell, looked away, and walked off. I have no idea what he wanted. But I know that if I hadn’t been watching, I would have heard nothing. And he wouldn’t have known I was inside.
That’s the thing nobody tells you about doorbells. They’re not just for seeing who rings. They’re for seeing who doesn’t ring.
My honest take on subscriptions: Skip them. Brands like Ring and Nest lock basic video recording behind a monthly fee. Without a subscription, a Ring doorbell can’t save or play back any video at all, per Security.org’s testing — unlocking that costs $4.99 a month, which is $250 over five years just to keep your footage. Newer no-subscription brands store video locally on the device or an included base station. Same core features, no monthly bill, ever.
My picks by situation:
- Renters who can’t run wiring: Tapo D210 battery doorbell. Mounts with screws or adhesive, runs 5–6 months on a charge, stores video on a microSD card in the included chime. No subscription. This is the easiest no-stress pick.
- Renters who want premium without the fee: Eufy E340 battery doorbell. Dual-camera so it sees both faces and packages at your feet. Stores locally on the HomeBase hub. More expensive upfront, but pays for itself in saved subscription fees within two years.
- Wired setup (you have existing doorbell wiring): Reolink Doorbell WiFi. 5MP video, person detection, microSD storage, no subscription. Best value pick if you can hardwire it.
What to look for when you’re shopping:
- Head-to-toe view (not just face). Look for a “4:3 aspect ratio” or “180-degree vertical field of view.” This matters because you want to see what’s in someone’s hands and what they’re doing with their feet, not just their face.
- Local storage option. Either microSD card or a base station included in the box.
- Person detection (not just motion). Without this, you get pinged every time a leaf falls. Useless.
- Two-way audio. So you can say “I’m not home” or “leave the package” from your phone, even when you’re not actually there.
Who should skip this: Almost nobody. Even in a secure apartment building with a controlled entry, a doorbell camera on your unit door is worth it because it tells you when neighbors, maintenance, or anyone else is at your door.
4. Door and window contact sensors
These are the most underrated products in home safety, and I almost forgot to include them.
A contact sensor is a tiny two-piece magnetic sensor. One half sticks on your door frame, the other half on the door itself. When the door opens, the magnetic connection breaks and your phone pings instantly. Same thing works on windows.
I have one on my front door, one on my bedroom window (ground floor, so it matters), and one on the sliding patio door. The first week I had them, I got a notification while I was at work that my front door had opened. My stomach dropped. I opened the camera app, and it was my apartment manager doing the annual fire inspection she’d emailed about, and I’d forgotten. Inspection done, I went back to my coffee. But the feeling that I would have known stuck with me.
That’s what these sensors give you. They’re not flashy. They don’t deter anything. But they tell you the second something changes, and that information is what lets you act fast.
My picks: Go with the Tapo Door Sensor Starter Kit (T31). Three contact sensors plus a hub with a built-in chime. When you’re away, it pushes a notification to your phone the second a door or window opens. When you’re home, the hub chimes out loud. Both jobs covered, and it’s Matter compatible. And if you already use Wyze gear, the Wyze Entry Sensor 3-pack keeps it in one app. Heads-up: it needs the Wyze Sense Hub, sold separately, so the real cost is higher. Only worth it if you already own the hub.
What to look for:
- App notifications, not just a chime. A buzzer at home only helps if you’re home. Phone notifications work everywhere.
- Battery life of at least 1 year. Cheap sensors die every few months and become a chore. Look for CR2032 battery type and a “2-year battery” claim.
- No subscription required. Same rule as everything else in this guide.
Who should skip this:
- Studios where every door and window is visible from where you sit. You can see them with your eyes.
- Apartments above the 3rd floor, where windows aren’t an actual entry concern.
For everyone else, two or three sensors on your main door and any accessible window is the cheapest peace of mind you can buy.
5. Motion-activated outdoor lights
I’m putting this third because, honestly, it’s the most situational product in Layer 2.
If you live in a house, a townhouse, or a ground-floor apartment with your own entryway, motion lights are a huge deal.
Someone approaching your door in the dark suddenly gets bathed in light. Most people up to no good immediately turn around because they don’t want to be seen.
My pick for the people it fits: ALUSSO LED Motion Sensor Outdoor Light. Hardwired, weatherproof, adjustable sensitivity so it doesn’t trigger every time a cat walks past. If you can’t hardwire because you’re renting, solar-powered motion lights stick to the wall with adhesive and charge themselves.
What to look for:
- At least 1,500 lumens. Anything less and it’s a nightlight, not a deterrent.
- Adjustable sensitivity dial. Critical for not getting woken up at 3 AM by raccoons.
- 30-second to 5-minute timer range. So the light stays on long enough to actually matter.
Who should skip this: Anyone in a multi-unit apartment building where you don’t control the exterior lighting. This is mostly for people with their own entry door from outside.
The honest takeaway for Layer 2
If you buy one thing in this layer, buy a video doorbell. If you buy two, add door/window sensors. If you have your own outdoor entry, add motion lights as the third. Total cost for the full layer if you go budget: about $60. Total cost for this setup: about $140. Either way, this is the layer where the dollar-to-peace-of-mind ratio is highest.
Layer 3: Slow Down Anyone Trying to Get In
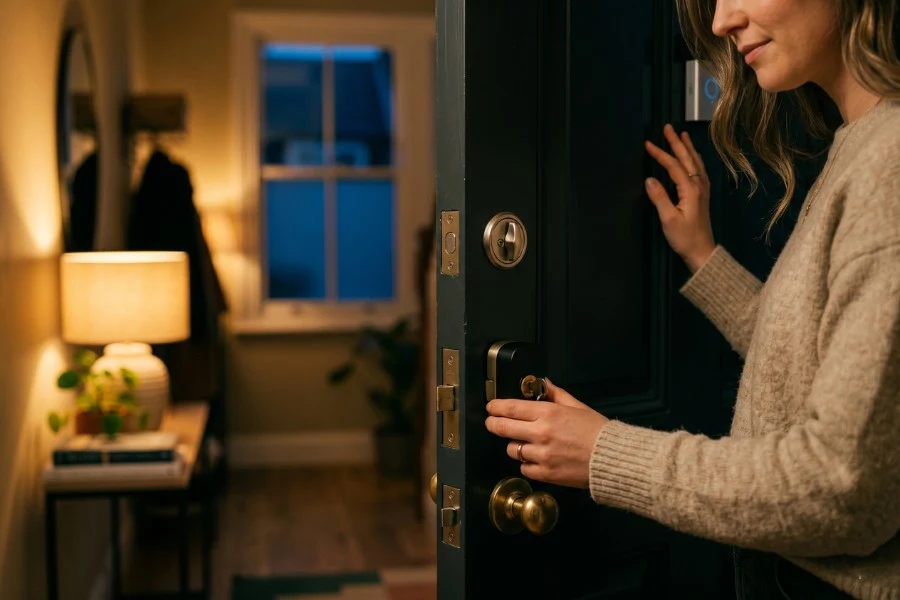
This layer matters when someone has actually decided to try your door.
I want to set expectations on this one before we get into products. Your job in this layer is not to win a fight with an intruder. Your job is to waste their time.
Most break-ins are over in under 10 minutes from the moment someone walks up to the door.
Average police response times in the US range from 4 to 11 minutes depending on the city, with most urban areas closer to 7. So the math is simple. If your door, lock, and window setup makes someone work for 90 seconds longer than they planned, they leave. Almost every time.
Here’s the part that surprised me when I started researching this.
The lock on your door is probably fine. The thing that fails is the strike plate, the small metal piece on the door frame that the deadbolt slides into.
Most builders install it with 3/4-inch screws that bite into nothing but the door trim. One solid kick and the whole thing pops off the frame. The lock didn’t fail. The wood around it did.
That’s the real weak point on almost every front door in America. And it’s the cheapest one to fix.
6. Door strike plate reinforcement/door armor kit
This is the single best dollar-for-dollar upgrade in this entire guide.
A door armor kit replaces your flimsy builder-grade strike plate with a long steel plate that runs along the door frame, anchored by 3-inch screws that go deep into the wall stud behind the trim.
I installed mine in a rental about a year and a half ago, and yes, I’m going to address the renter question because I know that’s the first thing you’re thinking. Will my landlord care? Almost certainly no.
- You’re not changing the door
- You’re not changing the lock
You’re swapping the small piece of metal already screwed into the frame and adding two longer screws.
When you move out, you swap the original strike plate back in (keep the old one in a drawer), or you leave the upgraded one and your landlord will, in 100% of cases, see it as a property improvement.
I asked my landlord directly before doing it. She said, “you’re paying for an upgrade to my unit, why would I care.”
My picks:
- The full kit: Door Armor MINI 3-Piece Kit. Includes a long strike plate, hinge reinforcements, and 3-inch screws. Takes about 45 minutes to install with a screwdriver. This is what I have.
- The budget version: Prime-Line strike plate. Just the long strike plate. Doesn’t reinforce the hinges, but the strike plate is where 90% of door failures happen anyway.
What to look for:
- 3-inch screws minimum. The whole point is anchoring into wall studs.
- At least 8 inches of plate length. Longer plates spread force across more of the frame.
- Steel construction, not aluminum.
- “Universal fit” or “fits standard residential door” in the listing.
Who should skip this: Nobody, honestly. Renter or owner, ground floor or 20th floor, this is the upgrade that matters most. The only exception is if you live in a building with full deadbolt-and-keycard entry where your unit door doesn’t face an exterior hallway. Even then, I’d still do it.
7. Portable door lock
The one I had in my bag during that Airbnb trip in Portland is still the one I use today.
A portable door lock is a small two-piece device. One part slides into the strike plate slot on your door frame. The other clips onto the strike plate from the inside.
When the door is closed and you’ve engaged the lock, the door physically cannot be opened from the outside, even if someone has a key. It’s a hard mechanical stop.
I bought it for travel and then realized I wanted it at home too. Now I use it every night before bed and any time I’m home alone for long stretches.
My pick: Portable Door Lock 2-pack. The original, still the standard, and the one that actually works on the widest range of door types. Travel-friendly because it’s small enough to fit in a toiletry bag.
What to look for:
- Works on inward-opening doors (most front doors and Airbnbs).
- Steel construction. Plastic versions exist, and they’re useless.
- No installation, no screws, no drilling. If it requires any of these, it’s not a portable lock.
Where it fails (please read this):
- Outward-opening doors. Some apartment building front doors open outward into the hallway. A portable lock can’t engage. Check before you buy.
- Doors with a gap. If there’s more than about a quarter-inch gap between your door and the frame, the lock can’t catch. Look at your door before you buy.
- As a daytime, away-from-home solution. This only works when you’re inside. It’s not a replacement for your regular lock when you leave.
Who should skip this: Anyone whose door opens outward into a hallway. Anyone who already has a deadbolt and a reinforced strike plate AND lives above the 5th floor in a building with secured entry. For everyone else, worth it just for the airbnb and hotel use alone.
Also Read: 32 Travel Safety Tips for Women Who Explore Alone
8. Window security film
I’m putting this third because, honestly, most apartment dwellers can skip it.
Window security film is a clear plastic film you apply to the inside of your window glass. When someone tries to break the window, the glass shatters, but the film holds it together.
So instead of clean shards falling out and a body climbing through, the intruder is left punching at a sheet of stuck-together glass for a couple of minutes.
This product matters if:
- You have ground floor windows
- You have a sliding patio door
- You live in a house with first-floor windows that aren’t visible from the street
If you’re on the 4th floor of an apartment building, your windows aren’t an entry path. Skip this section and save the money.
My pick for the people it fits: BDF S8MC Security Window Film. 8mil is the minimum thickness that actually does anything. Anything thinner is essentially decorative.
What to look for:
- 8mil thickness or higher. Below that, it’s not security film, it’s a privacy tint.
- Clear, not tinted, unless you also want privacy.
- Cuttable to your specific window size.
The honest takeaway for Layer 3
If you do only one thing in this layer, reinforce your strike plate. It’s the cheapest, most impactful upgrade in this entire guide. Total cost for this layer, if you go by budget: about $15. Full setup: about $100.
Layer 4: Be Ready If Something Actually Happens
This is the layer I genuinely hope you never have to use. Layers 1 through 3 are about preventing bad situations. Layer 4 is the one you build for the moment when prevention didn’t hold.
But here’s the part most safety guides get backwards. The “bad situation” they’re preparing for isn’t usually a break-in.
The most common emergency in a solo apartment, by a huge margin, is something boring:
- A kitchen fire
- A carbon monoxide leak from a malfunctioning heater
- A 6-hour power outage in February when your phone is at 12%
- A fall in the bathroom when nobody knows you fell
According to the latest data from the National Fire Protection Association, US fire departments respond to a home structure fire every 96 seconds, and three out of five home fire deaths happen in homes with no working smoke alarms.
That number is enormous compared to the statistical risk of a violent home invasion.
So this layer covers both. The dramatic worst case AND the boring worst case, because the boring one is way more likely to actually happen to you.
Four products. You probably need three of them. One of them is free.
9. Personal safety alarm
Let me be honest about what this product does and doesn’t do, because the marketing on these is way overhyped.
A personal alarm is a small keychain device that emits a 130+ decibel siren when you pull the pin. That’s about as loud as a jet engine at takeoff.
The point isn’t to disable an attacker. It’s to make the moment loud, which does two things at once:
- It draws attention from anyone nearby
- And it disrupts the attacker’s focus enough that you can move
Across safety experts and tested roundups, the number that comes up is 130 decibels. That’s the minimum to cut through traffic or a noisy street and actually get attention. Anything quieter is just a loud whistle.
But the decibel number matters less than this: in a high-stress moment, people fumble.
An alarm only works if you’ve practiced with it once, and it lives somewhere you can grab in one motion. Buried at the bottom of your bag, the loudest alarm does nothing.
It needs to be clipped to the outside of your bag, on your keys, or somewhere on your body. If you have to dig for it, it’s not a safety tool. It’s a decoration.
My pick: She’s Birdie Personal Safety Alarm. 130dB, strobe light, comes in multiple colors, so you’ll actually clip it to your bag. The brand donates 5% of profits to women’s safety organizations, which I appreciate.
Budget pick: Kosin Safe Sound 6-pack. 140dB, basic but loud. Buy the 6-pack and keep one on your keys, one in your gym bag, one by your bed, one in your car, and give two to friends.
What to look for:
- 130dB minimum. Below that is basically a loud whistle.
- Pin-pull activation (not a button you have to press and hold). In a real moment, your hands will shake. You want one motion.
- Strobe light included. Disorients attackers and makes you visible.
- Battery type listed. LR44 button batteries die quietly. Check yours every 3 months.
Who should skip this: Honestly, nobody. Even if you never use it, the cost-to-peace-of-mind ratio is unbeatable.
10. Combination smoke and CO detector
This is the product on this whole list that has the highest chance of actually saving your life, and almost nobody talks about it in “home safety for women” guides.
I’ll repeat the stat from above because it’s that important:
Three out of five home fire deaths happen in homes with no working smoke alarms.
The “no working” part is sneaky.
Most apartments come with a smoke detector installed. But the batteries are usually dead, the unit is often more than 10 years old (they expire), or it’s been disabled because it kept beeping during cooking and someone took the battery out.
So please, today, walk over to whatever’s mounted on your ceiling and check three things:
- Does it have a working battery
- What’s the date stamped on the back
- And is it a combination smoke + CO unit
If any of those are wrong, replace it.
Carbon monoxide is the part nobody warns you about. It’s odorless, colorless, and the symptoms feel exactly like a bad flu.
People die in their sleep from CO leaks every single winter, especially in older apartments with gas heating. A combination detector covers both threats in one unit.
My pick: First Alert Combination Smoke and Carbon Monoxide Detector. The 10-year sealed battery is the key feature. You install it once, and it works for a decade with zero maintenance.
What to look for:
- “Smoke AND carbon monoxide” in the title, not just smoke.
- 10-year sealed battery preferred. If you go with a replaceable-battery unit, set a calendar reminder.
- UL listed. This matters legally and safety-wise.
- Photoelectric sensor (better at smoldering fires, which are the kind that happen at night while you’re sleeping). Ionization sensors trigger on cooking smoke more. Both is best if you can swing it.
Who should skip this: Nobody. This is the most important product in this entire guide.
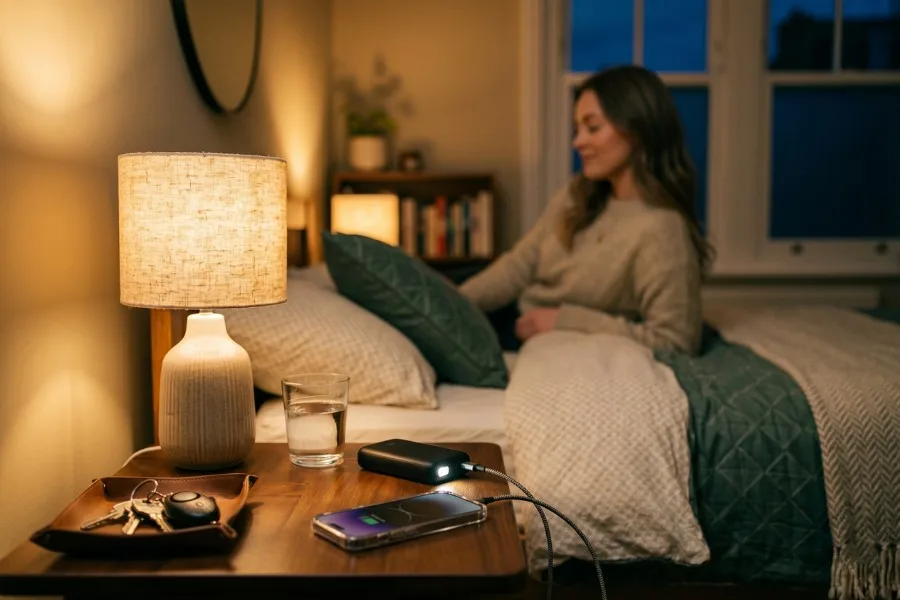
11. Power bank
I had a 6-hour power outage during a windstorm in my second year living alone, and it taught me how unprepared I was for something as boring as the lights going out.
My pick: Anker Power bank with built-in cable
What to look for:
- 10,000 mAh minimum. Anything smaller and you’ll get one phone charge, maybe one and a half.
- USB-C charging input. Older micro-USB power banks are obsolete and slow.
- LED battery indicator on the outside so you can see if it’s charged at a glance.
Who should skip this: Nobody. This one is also a no-brainer.
12. Free safety check-in setup (built into your phone)
The most important item in this layer costs zero dollars.
If you have an iPhone, open Messages, start a chat with someone you trust, tap the plus button, and find Check In. When you head out, you start one and set either a timer or a destination. If you arrive safely, it tells your person automatically. If you get delayed or stop responding, it prompts you first, then alerts your contact with your location and battery level if you still don’t answer. You choose how much it shares. Android users have Google’s Personal Safety app, and Life360 works on both.
I use it the way most women I know do.
Not daily, but any time there’s a small voice in my head: a first date, a late shift walk to the car, an unfamiliar route home. I start a check-in with my sister and go about my night, knowing that if I go quiet, she finds out automatically and has my location.
The honest takeaway for Layer 4
If you do only one thing in this layer, set up the phone check-in feature tonight. It’s free, takes ten seconds, and protects you against the emergencies you’re most likely to actually face. After that, the smoke and CO detector is non-negotiable. Total cost for this layer: about $150.
Now let me show you how to put all four layers together into something that actually fits your specific apartment, because reading 6,000 words about products is overwhelming.
That’s what the picker tool is for:
Build Your Home Safety Starter Kit
Answer 4 quick questions. I’ll show you exactly which products from this guide fit your apartment, and which ones you can skip.
What kind of place do you live in?
What floor are you on?
Renter or owner?
What worries you most?
Your starter kit
3 Starter Kits by Budget
The picker tool above will give you a customized list, but I know some of you just want me to tell you what to buy.
So here are three pre-built kits at different price points. Pick the one that matches your budget, click through, and you’re done in under 20 minutes.
1. The $50 Starter Kit (the bare minimum that actually works)
For when you just got your first apartment, money is tight, and you want the absolute essentials.
- Smart plug 2-pack
- Prime-Line strike plate
- Personal safety alarm
- Phone check-in setup
Who this is for: First apartment, college student, someone in transition, anyone who just needs to start somewhere.
2. The $150 Mid-Tier Kit (solid coverage across all 4 layers)
This is what I’d recommend to most women living alone. It hits every layer without overbuying.
- Smart plug 2-pack
- Tapo D210 video doorbell
- Prime-Line strike plate
- Portable door lock
- First Alert combination smoke + CO detector
- Phone check-in setup
Who this is for: Most readers of this guide. If you’re not sure which kit to pick, pick this one.
3. The $400 Full Setup (comprehensive without overbuying)
For when you’ve got the budget, you want it done right, and you’re not going to be revisiting this for 5 years.
- Smart plug 2-pack
- Eufy E340 video doorbell — $160
- Door/window sensors 3-pack — $59
- Door Armor MINI kit — $70
- Portable door lock
- First Alert combination smoke + CO detector — $45
- She’s Birdie personal alarm — $30
- Anker Power bank with cable — $60
- Phone check-in setup — Free
The total cost is close to $500, higher than $400, because I’d rather be honest with you, the full kit actually lands closer to $500 once you include everything.
If you want to cap at $400, drop the Eufy doorbell and go with the Tapo D210 instead, which brings the total closer to $360.
Who this is for: Homeowners, people in their forever apartment, women who want one buying weekend and then to never think about this again.
One more thing on the kits
These are the products I actually use, recommend to friends, and would buy again. Nothing on this list is here because it pays the highest commission.
The cheapest kit and the most expensive kit both hit the same four layers. The difference is just how much premium you’re paying for nicer cameras and a more comprehensive door kit.
If you’re truly torn between two kits, buy the smaller one. You can always add the doorbell or the door armor kit later.
What you can’t do is undo a $400 panic-purchase three months in when you realize you spent more on safety gadgets than the chance of a break-in really justified.
What I’d Skip (and Why)
I want to end the products section by telling you what NOT to buy, because every other listicle on the internet will recommend at least three of these, and they’re either useless or actively counterproductive for most women living alone.
1. Pepper spray
I know this is the one everyone wants to disagree with me on. So let me be specific about why I personally don’t carry it.
Pepper spray is legal in all 50 US states for personal defense, but several states have restrictions on container size, formulation, or who can purchase it, so check your state first. That’s the legal part.
The bigger issue is practical. Pepper spray requires you to:
- Have it accessible in one motion (not buried in a bag)
- Aim it correctly under stress
- Account for wind direction so it doesn’t blow back in your face
- Be close enough to use it but far enough to escape after
- Not hit yourself, bystanders, or the inside of your own apartment with it
The indoor part is what stops me.
If someone is inside your apartment and you use pepper spray, you’re now in a small enclosed space full of pepper spray.
- You can’t see
- You can’t breathe
- You can’t escape any faster than the attacker
Indoor pepper spray is a fairness equalizer at best and a tactical disaster at worst.
If you genuinely want a personal defense tool, take a self-defense class. The skill is more valuable than the spray.
2. Door knockers and “I’m not home” tricks
I’m talking about those products that hang on your inside doorknob and play a recording of a dog barking or a man’s voice when someone knocks.
They look clever on Amazon, and they fail in practice.
If someone is testing your door, they’re already there. A barking dog recording at the moment they ring the bell doesn’t change their plan, because they already know nobody else is home (which is why they picked your place to begin with).
At best, it’s mildly amusing. At worst, it tells them your dog is fake, and you’re alone.
The “look occupied” job from Layer 1 is way better served by smart plugs and lights running on schedules all day long, not a trick that activates only when someone is already at your door.
3. Full home security systems with monthly subscriptions
You don’t need ADT for an apartment. You don’t need SimpliSafe for a one-bedroom. The math doesn’t work.
A monitored security system runs $25 to $60 per month. Over five years, that’s $1,500 to $3,600.
For an apartment renter who moves every 1-3 years, you’re paying for installation, deinstallation, contract penalties, and a service that mostly just calls the police 8 minutes after an alarm trigger.
The products in this guide cost about $50 to $400 one time, cover the same four layers, and don’t lock you into anything.
The only women who benefit from a full monitored system are homeowners in standalone houses in areas with longer police response times.
If that’s not you, skip it.
4. Stun guns and tasers
Legality varies by state. Skill requirement is real.
- You have to get within arm’s reach to use them
- They can be taken from you and used against you
- They can fail in cold weather
- They require maintenance
For 99% of solo women, these are not the right product.
The combination of legal complexity, skill requirement, and failure modes makes them worse than just having a portable door lock and a personal alarm.
5. Fake security cameras
I’m putting this here because someone always asks.
Yes, you can buy a $10 dummy camera that just sits there pretending to be real. No, I don’t recommend it.
The problem isn’t that they don’t deter anyone. A University of North Carolina at Charlotte study that surveyed 422 burglars found roughly 60% would pick a different target after spotting a visible security system.
A camera-shaped object on your wall does some of that work.
But here’s the thing: the price gap between a fake camera and a real Wyze Cam or Tapo cam is so small there’s no reason to fake it.
A real camera gives you the deterrent value AND actual footage if something happens. A fake one gives you nothing the moment something goes wrong.
If you’re going to put a camera on display, make it real.
The Real Point of All This
I know this guide was long. Almost 8,000 words. I appreciate you sticking with it.
But before you close the tab, I want to leave you with one thing, because if you remember nothing else from this guide, remember this part.
Home safety isn’t about owning things. It’s about understanding what you’re actually protecting yourself from, then closing the gaps in the right order.
Most women living alone get the order wrong.
They buy the loud, dramatic product (pepper spray, a baseball bat, a personal alarm) and skip the boring, high-impact product (a strike plate upgrade, a working smoke detector, a free phone check-in feature).
The boring stuff is what saves you. Not in a dramatic break-in scenario you’ve seen on TV.
- In the small Tuesday-afternoon moment when your door is tested while you’re at the grocery store.
- In the 3 AM minute when your battery dies and you’d otherwise have no light.
- In the kitchen at 11 PM, when something starts smoking and a 10-year-old detector that nobody’s tested in years doesn’t go off.
You don’t need to feel anxious about this stuff. You just need to spend one Saturday afternoon installing a few products in the right order, then forget about them for the next five years.
- Start with the smart plug
- Get the strike plate next weekend
- Set up the phone check-in tonight
The whole list doesn’t need to happen at once. Just start somewhere, and start with the highest-leverage thing.
You live alone. You’re handling it. You’re doing more than people realize. The right gear quietly working in the background just gives you a little more bandwidth for the rest of your life.
If there’s something you use that’s been a game-changer, and I didn’t include it, I want to know.
Tell me in the comments. We’re all figuring this out together, and the next woman reading this guide might need exactly the tip you have.
Related reading on aloneactually:
- How to feel safe at night when you live alone — the companion piece to this guide, focused on the nighttime habits and routines that make home safety actually stick
- Front door safety hacks for women who live alone — deeper dive on just the door, including the conversation scripts for when someone unexpected knocks
- Safety tips for women living alone: a real-life guide — the hub guide on solo women’s safety that ties everything together
- Best Ways to Safely Walk Alone at Night — for the moments you’re not at home