
How to Make Your Apartment Safer Without Spending a Fortune
I priced security systems when I moved in alone, then found cheaper fixes that work better. Here are the renter-friendly ways to make your apartment safer.
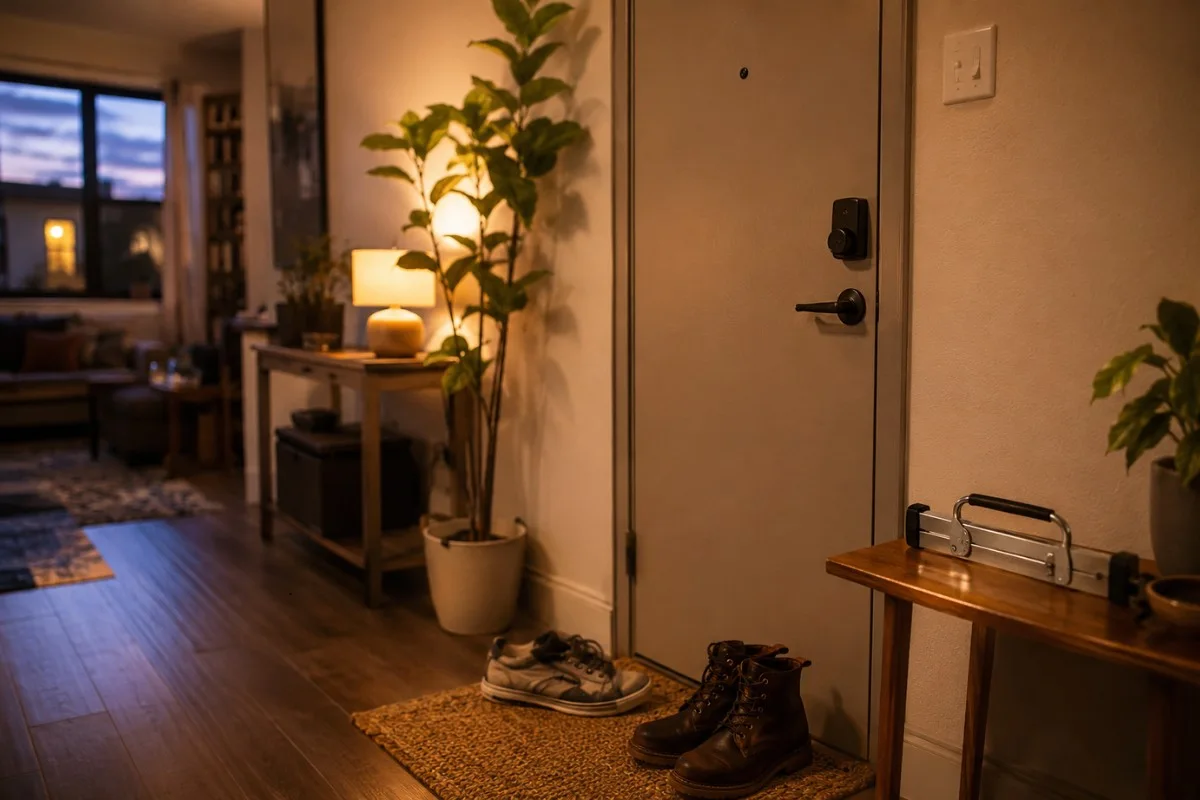
Here’s what nobody tells you when you move in alone and start panic-pricing security systems: the stuff that actually keeps you safe is cheap, and a lot of it is free.
I priced the systems too. The cameras, the monthly monitoring, the install fees. Then I looked at how break-ins actually happen and felt kind of silly.
According to the FBI’s own crime data, nearly 38% of burglaries are unlawful entries where no force is used at all. No broken window, no jimmied lock.
Someone just walked in through something that wasn’t secured.
Let that sink in. More than a third of break-ins don’t defeat your security. They walk past the absence of it.
So the expensive system isn’t solving the most common problem. A habit and a ten-dollar gadget are.
There’s one more thing that changed how I think about all this.
Most burglars aren’t looking for a challenge, they’re looking for easy, and research on burglar behavior found the majority say they’d leave the moment an alarm went off.
The goal was never to win a fight. It’s to look like more trouble than the next door over. That, you can do for almost nothing.
I rent. I’m not drilling holes, I’m not losing my deposit, and I’m not calling my landlord to ask permission to feel safe in my own home.
Everything below works around all three.
I’ve sorted it by what it costs, starting with free. Start at the top. You might not need to spend a thing.
The three tiers, so you can find your level fast:
Habits and rearranging. Costs nothing, works tonight.
The highest-leverage small buys. Start here if you’re spending anything.
Bigger renter-safe upgrades. No drilling, no deposit risk.
Work top down. Most people are surprised how far the free tier gets them.
1. Free Fixes That Work Tonight
Start here, even if you have money to spend.
The free stuff isn’t the consolation prize. Remember that FBI number from a second ago: most break-ins that succeed without force are walking past security that wasn’t there or wasn’t used.
Free fixes close exactly that gap. They cost nothing, and you can do every one of them before you go to bed.
1.1 Lock everything, every single time
I know. You came here for clever tricks, not your mom’s advice. But this is the one that matters most, so I’m not going to skip it to look smart.
The single cheapest safety upgrade you own is the lock you already paid for.
The reason that no-force entry number is so high is that people leave doors and windows unsecured, then assume the lock on the box is doing its job.
It isn’t, if it’s open.
Make it mechanical, not optional. I lock the door the second I’m inside, before shoes come off, before the bag hits the floor.
Same when I’m home in the daytime, which feels paranoid until you remember a lot of break-ins happen in broad daylight when a place looks empty.
Windows too, latched, not just shut. It takes ten seconds, and it’s free.
Also Read: DIY Home Security Upgrades for Women Living Alone
1.2 Make the place look occupied
Most of this is about not getting chosen in the first place.
A place that looks lived in and watched is a place someone skips. You don’t need gear for the basics:
- Leave a light on in a room that isn’t the bedroom, a kitchen, or a living room, reads as “awake,” a bedroom reads as “asleep.”
- Keep the TV or a radio going at low volume when you step out.
- Don’t let mail or deliveries pile up. Nothing says “nobody’s home” like three days of packages at the door.
If you’re out late, the place should look like someone’s in it, not like it’s waiting for you.
1.3 Rearrange for noise and time
You’re not building a barricade. You’re buying seconds and making sound.
- Push a chair so its back sits under the door handle at night.
- Set something that’ll clatter, a basket or a stack of pans, in front of the balcony or sliding door.
None of this stops a determined person. That’s not the point.
The point is that anything moved makes noise, and noise wakes you and rattles them.
Most people trying a door quietly leave the second it stops being quiet.
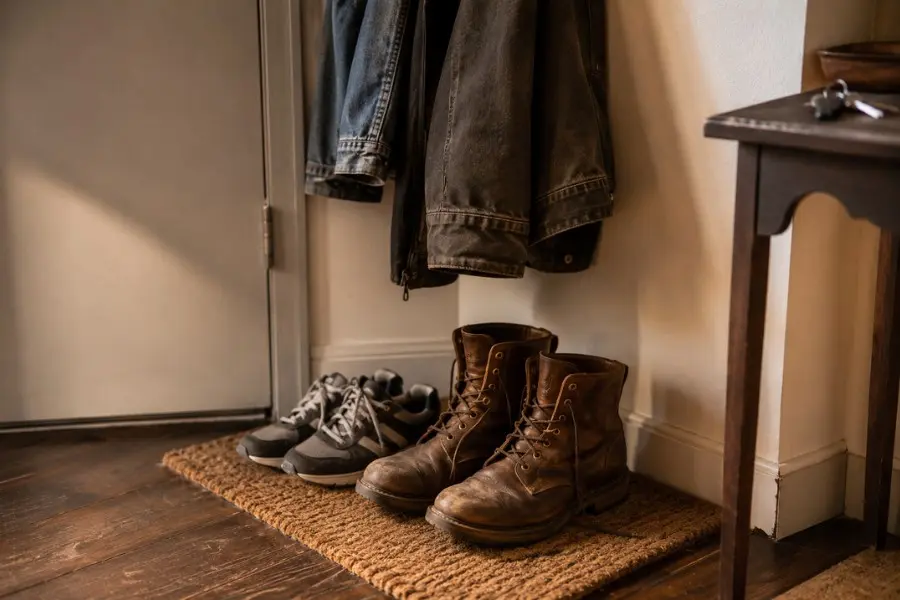
1.4 Stage a “someone else lives here” look
This one’s a little theatrical, and it works.
The idea is simple: look like more than one person, ideally more than one bigger person, lives here.
- Leave a pair of large boots or beat-up sneakers by the door.
- Hang a big jacket on the coat hook where it’s visible from the entry.
If someone glances in or sizes up the place, the read should be “household,” not “woman alone.”
I’m not thrilled that this is useful. It is, so it’s in.
1.5 Keep your essentials within reach when you sleep
If something ever does wake you, you don’t want to be feeling around in the dark for your phone.
Keep these in the same spot on the nightstand every night, close enough to find with your eyes shut:
- Phone, for calling out and for light.
- Keys. A car fob with a panic button sets off your car alarm from inside, a free, loud alarm you already own.
- A small flashlight.
Then know which two exits you’d actually use and what’s blocking them.
You’re not planning for disaster. You’re making sure that if your gut ever says move, you’re not starting from zero.
Also Read: 12 Things to Keep Near Your Bedside If You Live Alone
1.6 Trust the gut feeling, then act on it
This is free, and it’s the one women get talked out of most, so I’ll say it plainly: if something feels off, treat it as information, not paranoia.
- A figure in the lot that’s there too long
- A door that’s unlatched when you know you latched it
- The neighbor whose knock doesn’t sit right
You don’t owe anyone the benefit of the doubt at your own threshold. Text someone where you are. Wait in a locked car. Don’t go in.
The cost of being wrong is a little awkwardness. The cost of overriding the feeling is a lot worse. Acting early is free, and it’s usually right.
2. Under $10: The Highest-Leverage Cheap Buys
If you’re going to spend anything, spend it here first.
These are the items where a few dollars does an absurd amount of work, mostly by making noise or making your place look like a bad idea to try.
Quick map before the detail:
| What | Roughly | What it actually does |
|---|---|---|
| Doorstop alarm | $8–10 | Wedges the door shut and screams if pushed |
| Sliding-door bar or dowel | $2–8 | Blocks a sliding door even when the latch is defeated |
| Fake-deterrent stickers and signs | $5–8 | Makes the place look monitored |
| Smart plug for lights | $8–10 | Puts your lights on a schedule so the place looks occupied |
2.1 A door stop alarm (the best $10 you’ll spend)
This looks like an ordinary rubber door wedge. It is not.
You slide it under an inward-opening door, and if anyone pushes the door, two things happen at once: the wedge physically resists the door opening, and a siren goes off.
And it is loud. The common ones are rated at 120 decibels, which is up around thunderclap and rock-concert territory.
When the team at Bob Vila tested door alarms, they were wearing ear protection and still backed away from the thing. That’s the point.
It does two jobs at once:
- Wakes you, so you’re never the last to know.
- Rattles whoever’s on the other side, because quiet entry just became the opposite.
No wiring, no WiFi, no install. Most run on a 9V battery and have a sensitivity dial.
I keep one at the front door and a second by the bedroom, and they’re the first thing in my bag for hotels and rentals where I don’t control the locks.
I have these – Amazon
One honest limit: it only works on inward-opening doors with a small floor gap. If your door swings out or has a big gap under it, this isn’t your tool.
2.2 A bar or dowel for the sliding door
Sliding doors and windows are the weak spot people forget, and a “locked” one is easier to defeat than you’d like.
The latch on most sliding doors is flimsy, and the door can sometimes be lifted or jimmied out of the track.
The fix costs almost nothing. Drop a rigid bar in the track so the door physically can’t slide, even if someone gets the latch open.
You’ve got options at basically every price:
- A cut length of wooden dowel or PVC pipe, a couple of dollars at any hardware store.
- A purpose-made adjustable security bar, if you want something that looks tidier, usually under $10.
It takes ten seconds to place, and it turns the easiest entry point in a lot of apartments into one of the more annoying ones.
If you’re on the ground floor or near a fire escape, do this one tonight.
2.3 Deterrent stickers and a fake sign or two
Remember the behavior pattern: most people looking for a way in are looking for easy, and they read a place before they touch it.
You can shape that read cheaply.
- A couple of “alarm system” or “video surveillance” window stickers.
- A small “beware of dog” sign, even if your only dependent is a houseplant.
This is pure psychology, and that’s fine, because deterrence is psychology.
The goal was never to win a confrontation. It’s to look like more trouble than the unit next door, so nobody picks yours in the first place.
A few dollars of stickers punches well above its weight.
2.4 A smart plug to put your lights on a schedule
This is the cheap upgrade to the free “leave a light on” trick.
Instead of one light burning all day, a smart plug runs a lamp on a believable schedule, on around dusk, off late, so the place looks lived in whether you’re home, working late, or away for the weekend.
- Set it to a schedule so the timing looks human, not like a single light stuck on 24/7.
- Control it from your phone if you want to flip a light on while you’re still walking up to the building.
They’re usually $8 to $10 for one, less per plug in a multipack, and they take about a minute to set up with no wiring.
This is the one I use – Amazon
Pair it with a lamp you already own, and you’ve turned “leave a light on” into something that actually tracks a real day.
3. Under $30: Worth It If You Can Stretch
These cost a little more, but they’re still renter-safe, no drilling, no deposit risk, and they target the spots that actually matter: the door you come through and the windows on your floor.
If the free tier is about habits and the $10 tier is about noise, this tier is about buying time, the minutes that make someone give up and leave.
3.1 A portable door lock
This is the upgrade to the door stop alarm for anyone whose door doesn’t suit a wedge, or anyone who just wants a hard physical block.
A portable door lock slips into the door frame or over the latch after you’ve locked up, and braces the door so it can’t be opened, even by someone with a key.
That last part is the whole pitch.
If you’ve ever had the thought, “who else has had a copy of this key,” a previous tenant, an ex-roommate, a landlord, this is the answer.
The deadbolt doesn’t care who has a key. This does.
- No tools, no install, it grips the existing frame or strike.
- Travel-friendly, it goes in your bag for hotels and rentals where you don’t control the locks.
Most are $10 to $15.
I have this one – Amazon
3.2 Security window film
Let’s be precise about what this does, because a lot of listings oversell it.
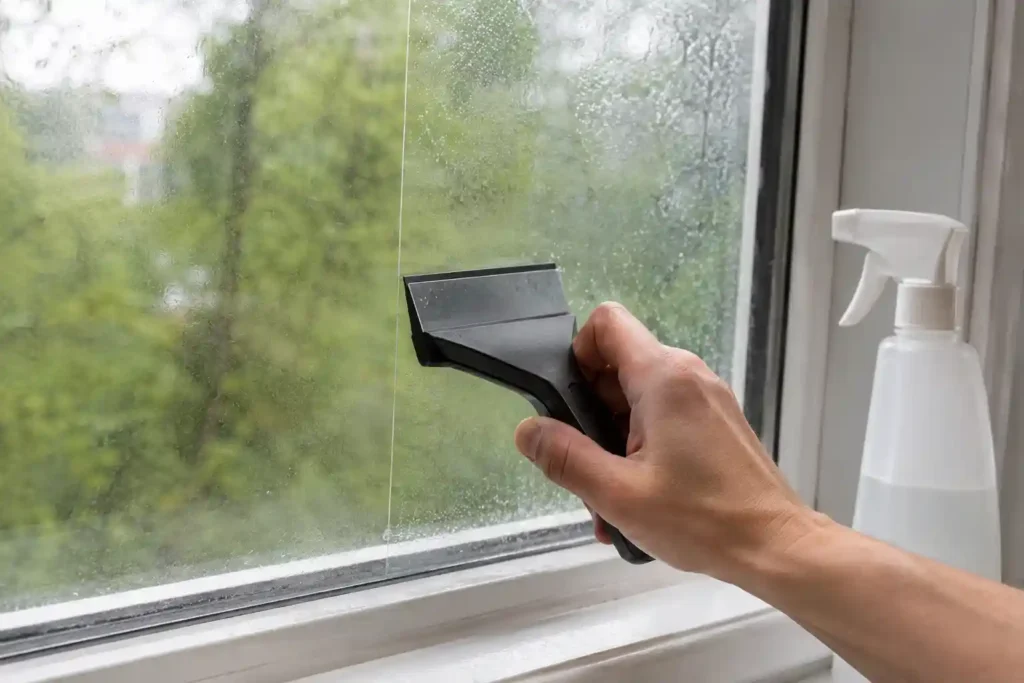
Security film is a thick polyester layer you apply to the inside of the glass. It does not stop the glass from breaking.
What it does is hold the shattered pieces together so the window doesn’t give way on the first hit.
That changes the math for someone trying to get in.
That delay is the entire point of the product category.
The professional-grade version of this glazing is certified around a multi-minute forced-entry delay under the UL 972 burglary-resistant standard, and the design goal is always the same: not to make glass unbreakable, but to buy enough time and noise that an opportunistic break-in gets abandoned.
For comparison, bare glass buys almost nothing.
Worth being honest about the limits, since I don’t want to oversell it either.
Those certifications are tested on professionally installed, frame-anchored commercial assemblies, not a $25 roll you apply yourself with a spray bottle, so your DIY film won’t match a lab rating.
An industry guide on what film can’t do says it plainly: film isn’t bulletproof, it won’t stop a determined attacker forever, and it works best alongside other layers.
For a renter on a budget, though, the trade is good. A single roll runs under $30, covers multiple windows, applies with a spray bottle and patience, and peels off when you move.
If you’ve got ground-floor or fire-escape-adjacent windows, this is where I’d put the money.
3.3 Stick-on motion sensor lights
Darkness is a gift to anyone who doesn’t want to be seen.
Cheap motion lights take that away, and they do double duty: they remove the creepy dark corners inside, and a light that snaps on by an entry is a small “you’ve been noticed” signal outside.
- Battery-powered and adhesive, so they stick anywhere with no wiring: entryway, hallway, closet, under a counter.
- Trigger on movement, so you’re never fumbling for a switch in the dark, and a room lighting up on its own is genuinely reassuring when you’re home alone.
An 8-pack usually runs around $20, and they last months on a set of AAAs.
These are the ones I use – Amazon
Put one wherever you’ve ever felt that little hesitation before walking in.
3.4 A no-drill peephole or doorbell camera
The point here is simple: see who’s at the door without opening it and without putting your shadow across the peephole.
You’ve got two renter-friendly routes, neither needs tools:
- A clip-on peephole camera that sits over your existing peephole.
- A small stick-on doorbell camera with an adhesive back, no screws, no landlord conversation.
Most start around $30 and run for months on a charge.
This one is popular right now – Amazon
The relief is real, you can check a late-night knock from across the room instead of holding your breath at the door.
4. Build a Noise and Awareness Plan
Everything so far has been about keeping someone out or making them give up.
This section is the backup plan: making sure that if anything ever does happen, you know about it fast. You can’t react to what you sleep through.
The idea is to tune your space so it works for you, quiet enough to rest, alert enough to notice.
Here’s the setup I use.
4.1 A sound machine you can still hear past
This sounds backwards in a safety guide, but hear me out.
A sound machine is mostly for sleep, it drowns out the city so you actually rest. The safety trick is in the volume.
Set it just low enough that it masks the random street noise but not the sounds of your own apartment.
You still want to catch the front door, a floorboard, the balcony track.
You’re not blasting white noise into oblivion. You’re setting a floor under the noise, so anything closer and louder still reaches you.
4.2 Set your phone to alert you, not annoy you
The goal is a phone that stays silent for junk and speaks up for the things that matter, so you never start tuning out the alerts.
- Trim notifications to the essentials overnight, you don’t need every app pinging while you sleep.
- If you run any camera or sensor app, set it to notify only on motion at your entry points, not every passing car.
- Turn on the flash-on-alert setting so the screen and LED light up when something comes through. On an iPhone, that’s the LED Flash for Alerts toggle in accessibility settings. A flashing light wakes you even with the sound machine running.
The point isn’t more alerts. It’s fewer, sharper ones, so when your phone does speak up, you trust it.
4.3 Decide what you’d do before you ever need to
Awareness without a plan is just anxiety. A thirty-second mental rehearsal turns it into something useful.
- Know your two exits and what’s blocking each one.
- Know where your phone, keys, and flashlight live at night, same spot every time.
- Know who you’d text or call and keep that thread easy to reach.
You’ll almost certainly never run this play. But deciding it now, calmly, means you’re not making it up at 3 a.m. with your heart going.
Fear shrinks when there’s a plan sitting behind it.
5. What I’d Skip
Part of doing this on a budget is not wasting the budget. A few popular “safety” buys look reassuring and do close to nothing, and a couple can actually backfire.
Here’s where I’d keep my money.
| Skip | Why |
|---|---|
| Cheap fake cameras that look fake | An obvious plastic dome with a blinking light reads as a bluff. Stickers sell “monitored” more convincingly for less. |
| Anything that needs drilling | You risk your deposit and you don’t need to. Every fix above is renter-safe and reversible. |
| Subscription-locked basics | Plenty of cameras push a monthly fee. For basic live view and alerts you usually don’t need it. Don’t pay monthly for what the device already does. |
| “Tactical” self-defense gadgets | Most are impulse buys you’ll never train with. Your money does more on locks, lights, and noise. |
A little more on the two that matter most:
5.1 The obviously fake camera
A real-looking deterrent works.
A six-dollar dome that screams “I’m plastic” can do the opposite, it tells someone paying attention that you’re bluffing, which is worse than nothing.
If you want the deterrent effect, the stickers from Section 2 do it more cheaply and more convincingly.
5.2 The subscription trap
This is the one that quietly costs the most over time.
A lot of budget cameras are sold cheaply and then lean on a monthly plan for features like recorded clips.
For what this guide is about, seeing who’s at the door and getting a motion alert, the free tier is almost always enough.
Buy the device, skip the plan unless you decide later you genuinely want cloud recording.
A $30 camera that costs $5 a month is a $90-a-year camera.
The throughline: spend on the things that physically slow someone down or reliably tell you they’re there. Skip the things that only look like they do.
One Last Thing Before You Go
If you read this far, I don’t think you’re really here to buy a door wedge. You’re here for the feeling on the other side of it.
The being able to fall asleep without running the locks in your head. The walking in after dark without that little hold in your chest.
So here’s what I want you to take from all of this: feeling safe was never about how much you spent.
The most effective things in this whole guide are free.
Lock up every time. Make the place look lived in. Trust the feeling that says something’s off. The ten-dollar alarm and the window film are good, and I’d grab them when you can.
But they’re the bonus, not the foundation.
And you don’t have to do it all tonight. Pick one thing.
Wedge a dowel in the sliding door, or put your keys and phone in the same spot by the bed, or just lock the windows you’ve been meaning to lock.
One small thing done is worth more than a whole list you’re saving for later.
You’re not paranoid for wanting this. You’re not overreacting. You’re a person making your space yours, on your terms, on whatever budget you’ve got.
That’s not fear. That’s you taking up your own space and deciding it’s worth protecting.
FAQs
What’s the cheapest way to make an apartment safer?
The cheapest fixes are free, and they’re also some of the most effective. Lock every door and window every time, make the place look lived in with a light or TV left on, and keep your phone and keys within reach when you sleep. This matters because, per the FBI’s crime data, nearly 38% of burglaries are unlawful entries with no force at all, meaning someone walked in through something that wasn’t secured. See Section 1 for the full free-tier list.
Can renters improve security without losing their deposit?
Yes, and every method in this guide is built around exactly that. Portable door locks, door stop alarms, sliding-door bars, stick-on motion lights, and security film all install with no drilling and peel off or pack up when you move. You never have to ask your landlord or risk a single dollar of your deposit.
Do fake security cameras actually work?
A convincing deterrent can help, but a cheap dummy camera that obviously looks fake can backfire by signaling to anyone paying attention that you’re bluffing. “Alarm system” and “video surveillance” window stickers tend to read as real far more easily, and they cost less. If you want the deterrent effect on a budget, lean on stickers over a plastic fake camera.
Does security window film really stop break-ins?
Not exactly, and it’s worth being precise. Film doesn’t keep glass from breaking; it holds the shattered pieces together so the window takes ten or more hits to clear instead of one, which window film testing shows adds roughly two to three minutes of loud effort. That delay is the point, since most opportunistic break-ins are abandoned once entry drags on. It’s a strong, cheap layer, but it works best alongside good locks and habits, not on its own.
How can I make my apartment feel safer with no money at all?
Start with the free tier in Section 1. Lock up religiously, stage a “someone else lives here” look with a pair of large boots by the door, rearrange furniture so anything moved makes noise, and decide your two exits before you ever need them. None of it costs anything, and together it closes the exact gap that most no-force break-ins rely on.