Essential Home Maintenance Skills Every Woman Living Alone Should Know
Learn the home maintenance skills every woman living alone should know, from emergency shutoffs to easy DIY fixes, tools, safety, and when to call a pro.
I’m going to tell you something embarrassing.
The first time something broke in my apartment, I called my mom. Not because she would know what to do. She didn’t. I just needed someone on the phone while I panicked about the kitchen faucet that would not stop dripping at 1 AM.
She told me to put a towel under it and deal with it in the morning. That was the extent of our combined home repair knowledge.
I didn’t know where the water shutoff was. I didn’t even know my apartment HAD a water shutoff. I didn’t know what a P-trap was, or that the circuit breaker panel in my hallway closet wasn’t just a scary metal box I was never supposed to touch. I couldn’t tell you the difference between a Phillips-head and a flathead screwdriver if you put a gun to my head.
And honestly… I didn’t feel dumb about it. I felt mad. Because nobody had ever shown me any of this stuff.
Not once. Not my parents, not school, not any of the “adulting” content I’d consumed before moving out. Home maintenance was just… filed away in the “things someone else handles” drawer. And suddenly I was the someone else.
If you’re reading this, you probably know exactly what I’m talking about.
That moment where something breaks or leaks or makes a weird noise, and your brain doesn’t go “ok let me fix this.” It goes “who do I call.”
Not a plumber. Just… a person. Any person who might know more than you.
Yeah. I’ve been there. Many, many times.
Here’s what I want you to know. You’re not behind. You’re not the only one. 96% of homeowners say this stuff should’ve been taught in school, and it wasn’t.
So it’s not a YOU problem. It’s a system problem.
And the good news is that almost everything in this guide takes less than 10 minutes to learn. Some of it will save you thousands of dollars. All of it will make your home feel less like a place that might fall apart on you, and more like a place that’s actually yours.
I didn’t write this as some overwhelming master checklist. I wrote it the way I actually learned, over seven years of living alone and figuring things out the hard way:
- Start with the emergency stuff you need to know today, before anything breaks
- Then the quick wins that take 10 minutes and make you feel like you just leveled up
- Then the stuff that sounds scary but really isn’t once someone walks you through it
- Plus a real, honest framework for when to just call a professional, because knowing when NOT to touch something is its own skill
Whether you rent or own. Whether you’ve never held a wrench or you just have some gaps. This is the guide I wish someone had handed me the day I got my keys.
Let’s start with the three things you need to know right now. Like, today.
Table of Contents
- 1. The Three Things You Need to Know Before Anything Breaks
- 2. Quick Wins: 7 Skills You Can Learn in Under 10 Minutes
- 3. Repairs That Feel Bigger Than They Are
- 4. When to DIY and When to Call a Pro
- 5. If You Rent: Know Your Boundaries
- 6. Your Starter Toolkit
- 7. Seasonal Maintenance
- 8. Safety When You Live Alone
- 9. Where to Learn More
- You Were Never Taught This. Now You Know.
1. The Three Things You Need to Know Before Anything Breaks
If you read nothing else in this guide, read this part.
I’m serious. You can skip everything else and come back later.
But this section? This is the stuff that turns a small problem into a small problem, instead of a $10,000 disaster. And the difference is literally just knowing where three things are in your home.
Think of these as your home’s emergency off switches. You probably walk past them every day. You just don’t know what they are yet.
1.1 Your Water Shutoff Valve
This is the single most important thing in this entire guide.
If a pipe bursts, a toilet overflows, or a hose under your sink just randomly decides to let go (it happens, and it happens fast), you need to stop the water.
Not in 20 minutes after you’ve Googled it. Not after you’ve called your landlord and left a voicemail. NOW.
Here’s why this matters so much. Water damage gets expensive at a speed that will make your head spin.
- Within the first 24 hours, you’re looking at maybe $500 to clean up
- Wait 48 hours, and mold starts growing, and now you’re at $3,000 or more
- A week? You could be looking at $10,000 to $30,000 in reconstruction
FEMA says just one inch of standing water can cause up to $25,000 in damage.
All of that can be avoided if you can shut the water off in the first few minutes.
So where is it?
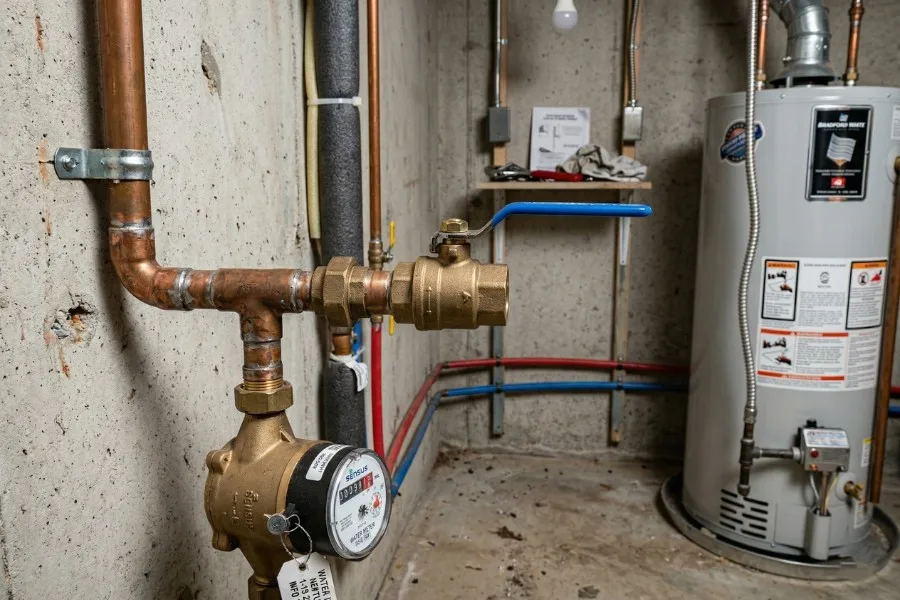
- If you’re in a house, it’s usually in the basement, a utility closet, or wherever the main water line enters the building. Look for a round valve (turn clockwise to close) or a lever handle (turn it 90 degrees so it’s perpendicular to the pipe)
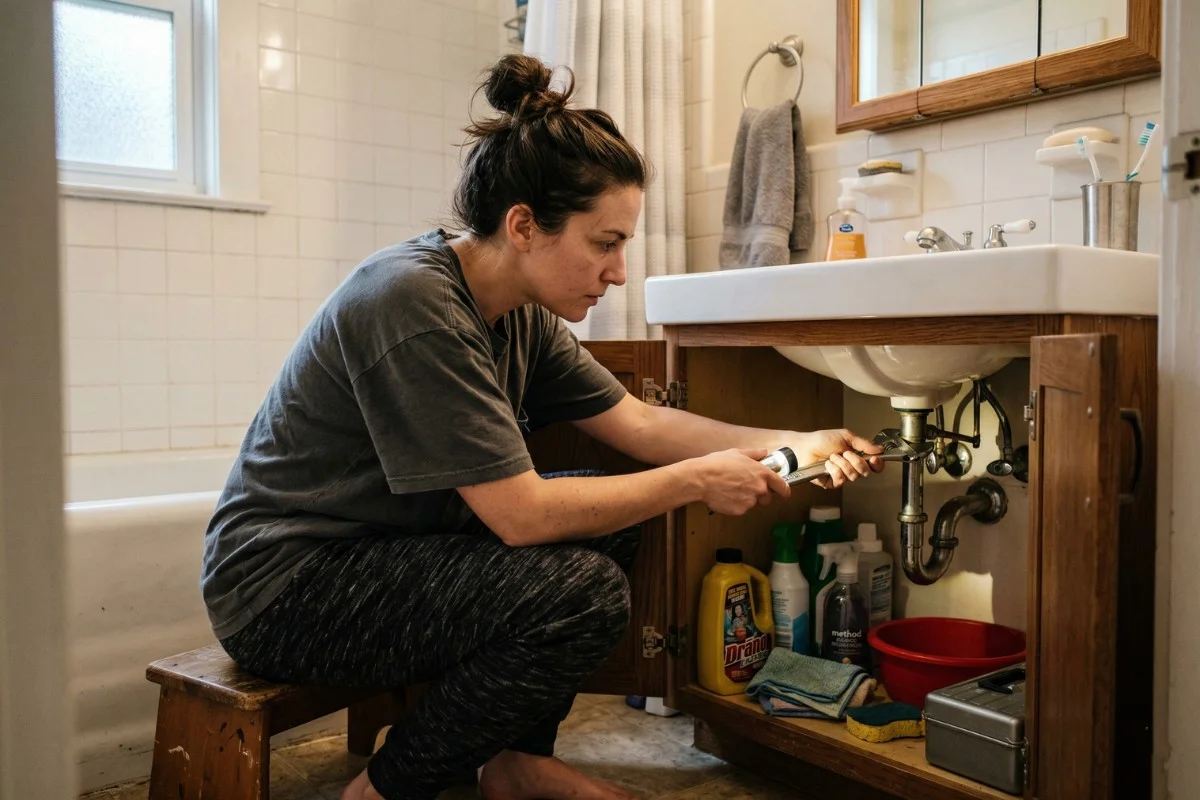
- If you’re in an apartment, check under your kitchen sink, in a bathroom utility panel, or in a hallway closet. You might have a unit shutoff AND a building shutoff. Know both
- If you genuinely cannot find it, ask your landlord or building super. Don’t be embarrassed about this. Just ask
Do this today: Find it. Turn it off and back on to make sure it actually works. The absolute worst time to discover your shutoff valve is stuck or rusted is when water is spraying everywhere. Take a photo of it on your phone so you remember where it is. And if you have a friend or neighbor with a spare key, show them where it is, too.
1.2 Your Electrical Panel
That metal box in your closet or basement with all the switches? That’s your electrical panel, also called a breaker box. And it’s not as intimidating as it looks.
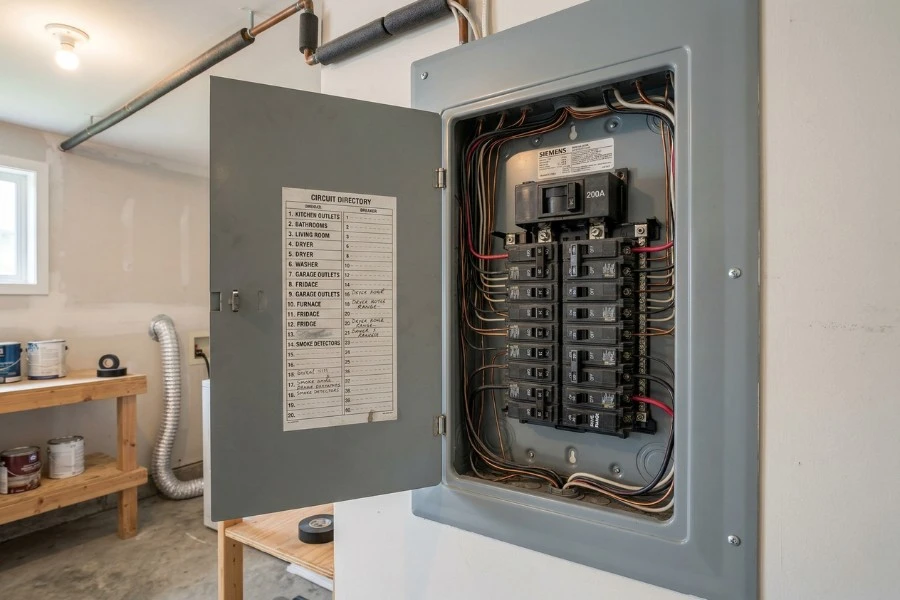
Every switch in there controls a different area of your home.
When something electrical goes wrong, like an outlet stops working, all your lights go out in one room, or you plug in too many things, and everything shuts off, the answer is usually in this box.
What a tripped breaker looks like: Most breakers have three positions. ON, OFF, and a middle position that’s slightly out of line with the others. That middle position means it tripped.
To reset it, flip it all the way to OFF first, then back to ON. Don’t just push it to ON. It won’t work.
The 20-minute project that will save you so much stress: Grab a lamp, plug it into an outlet, and then flip breakers one at a time to figure out which switch controls which area. Then label them.
A piece of tape and a marker is all you need. Future you at 11 PM when the bedroom outlet dies will be very, very grateful.
Also, learn what a GFCI outlet is. Those are the outlets with the little “test” and “reset” buttons on them, usually in your kitchen and bathroom. If one of those stops working, press reset. That’s it.
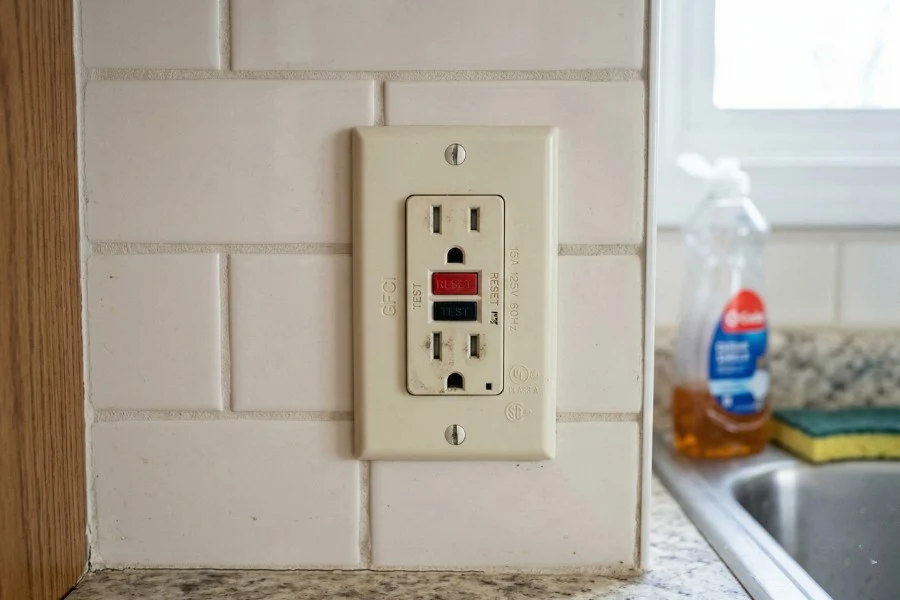
That’s the fix 90% of the time. If it won’t stay reset, that’s actually a warning sign, and you should call an electrician.
1.3 Your Gas Shutoff (If You Have Gas)
Not every home has gas, so check whether yours does. If you have a gas stove, a gas furnace, or a gas water heater, then yeah, you need to know this one.
Your gas meter is usually on the outside of your building.
The shutoff valve is right there on the pipe, and you’ll need a wrench to turn it. Keep one nearby. Some people zip-tie a wrench to the meter pipe so it’s always there.

When to shut it off:
- You smell that rotten egg smell (that’s the additive they put in gas so you can detect it)
- You hear a hissing sound near any gas appliance
- After an earthquake or any event that could have damaged gas lines
One really important thing. If you do shut off the gas, do NOT turn it back on yourself. Leave the house, call your gas utility company from outside, and let them handle it. Turning gas back on requires checking every pilot light and appliance, and if it’s done wrong, it’s genuinely dangerous.
OK. If you’ve done these three things, finding your water shutoff, your electrical panel, and your gas shutoff, you are already ahead of most people.
I’m not exaggerating. 14,000 Americans deal with a water damage emergency every single day, and a huge chunk of that damage happens because people didn’t know how to stop the water fast enough.
You just fixed that for yourself. In like 20 minutes.
That’s a pretty good start.
2. Quick Wins: 7 Skills You Can Learn in Under 10 Minutes
Ok, so the emergency stuff is handled. You know where your off switches are.
That alone puts you ahead of like half the population, and I’m not even joking about that.
Now let’s get into the fun part. Well, maybe “fun” is a stretch. But these are the skills that made me go from “I need to call someone” to “wait, I can just do this myself?”
And every single one takes less than 10 minutes. Some of them take less than two.
The best part? Each one of these saves you somewhere between $50 and $250 in service calls. So you’re basically getting paid to learn.
2.1 Change Your HVAC Air Filter
This is the easiest thing you’ll ever do in your home and also one of the most important.
Your HVAC system (that’s your heating and air conditioning) has a filter. It catches dust, pet hair, pollen, all that stuff.
When it gets clogged, your system has to work way harder, your air quality gets worse, and eventually the whole thing breaks down.
A clogged filter is literally the number one cause of HVAC failures.
Here’s all you do. Find the filter (usually behind a vent on the wall or ceiling, or in a slot on the furnace itself). Pull it out. Look at the size printed on the edge of the frame. Buy the same size at any hardware store or on Amazon. Slide the new one in with the arrow pointing toward the vent. Done.
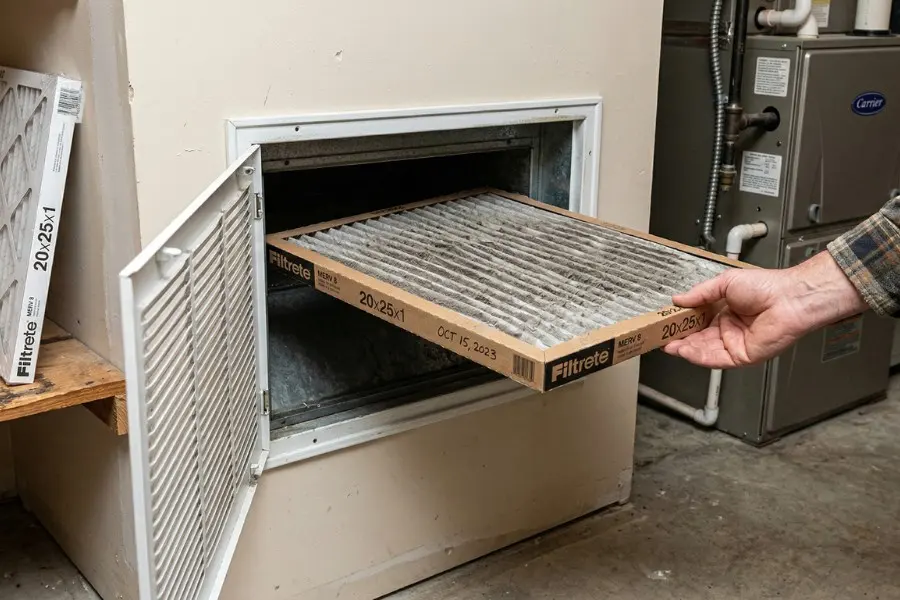
Do this every month. A filter costs $5 to $15. A new HVAC system costs $5,000 to $15,000. That math is not hard.
2.2 Unclog a Drain Without Chemicals
Please don’t pour Drano down your pipes.
It works in the short term, but it eats away at your plumbing over time, and if it doesn’t clear the clog, now you’ve got a pipe full of toxic chemicals that a plumber has to deal with. Nobody wants that.
For a slow drain: Pour half a cup of baking soda down the drain, then half a cup of white vinegar. It’ll fizz. That’s normal and honestly kind of satisfying. Let it sit for 15 to 30 minutes, then flush with hot water.
This works great for buildup and minor clogs.
For an actual clog: Use a plunger. And here’s something most people don’t know. There are two kinds of plungers. The flat one is for sinks. The one with the extra flange (that little extended rubber piece inside) is for toilets.
If you’ve been using a flat plunger on your toilet and wondering why it doesn’t work… that’s why.
Prevention: Get a hair catcher for your shower drain. Seriously. That one little thing will save you from so many gross clogged drain situations.
2.3 Reset a Tripped Breaker or GFCI Outlet
We covered this in the emergency section, but just to make it super clear as a standalone skill:
Breaker: Flip it fully to OFF, then back to ON. If it keeps tripping, that means something on that circuit is pulling too much power, or there’s a wiring issue.
Unplug stuff on that circuit and try again. If it still trips, call an electrician.
GFCI outlet (the one with the buttons): Press reset. If it won’t hold, unplug everything from that outlet and try again. If it still won’t reset, it might be protecting you from an actual fault. Call an electrician.
Takes about 30 seconds. Saves you a $100+ service call.
2.4 Fix a Running Toilet
If your toilet sounds like it’s constantly running water even when nobody has flushed it, I have great news. This is almost always a $5 fix.
Lift the tank lid off the back of your toilet. Look at the bottom. You’ll see a rubber piece called a flapper.
It’s basically a little rubber seal that opens when you flush and closes to let the tank fill back up. Over time, it gets warped or cracked and doesn’t seal properly, so water just keeps running through.
Go to any hardware store. Tell them you need a toilet flapper. They’ll cost you like $5 to $8. You literally unhook the old one and hook the new one on. No tools. No plumber. Maybe five minutes of your time.
Here’s why you shouldn’t ignore this one. A running toilet can waste up to 200 gallons of water per day.
That’s your water bill going up for no reason, plus you’re wasting a genuinely ridiculous amount of water over something that costs less than a coffee to fix.
2.5 Tighten a Loose Handle or Squeaky Hinge
This one is almost too simple to include, but I’m including it because the first time I tightened a loose cabinet handle myself, I felt unreasonably proud.
Like I had accomplished something. And I want that for you.
Loose cabinet handle or door knob: Grab a screwdriver. Tighten the screws. That’s it. That’s the whole skill.
Squeaky door hinge: WD-40 if you have it. Cooking spray if you don’t (seriously, it works). Spray the hinge pin, open and close the door a few times to work it in. Silence.
2.6 Replace a Showerhead
If your showerhead is crusty, has weak pressure, or you just hate it, you can swap it out in about five minutes with zero tools.
Unscrew the old one by turning it counterclockwise. If it’s stuck, wrap a rubber band or a rubber jar opener around it for grip.
Take a piece of teflon tape (white, thin tape you can get at any hardware store for like $2), wrap it around the threads on the pipe a few times clockwise.
Screw the new showerhead on by hand. Turn on the water and check for leaks.
That’s it. You just upgraded your daily shower experience, and you didn’t call anyone, or wait for anyone, or pay anyone to do it.
2.7 Test and Replace Smoke Detector Batteries
I saved this one for last because it’s the most important quick win on this list, and I don’t want you to skip it.
Working smoke alarms reduce your risk of dying in a home fire by 60%.
And you know what the number one reason smoke alarms don’t work when people need them? Dead batteries. In 43% of the cases where smoke alarms failed, the batteries were just missing or dead. That’s it.
Monthly: Press the test button on every detector. If it beeps, you’re good. If it doesn’t, replace the battery right now.
Annually: Replace the batteries whether they seem fine or not. Pick a date you’ll remember. Your birthday, New Year’s Day, daylight saving, whatever works.
Every 10 years: Replace the entire unit. Flip it over and check the manufacture date on the back. If it’s more than 10 years old, the sensors are degraded, and it might not go off when you need it to.
This takes three minutes, and it could literally save your life.
Especially when you live alone, and there’s no one else in the house to smell smoke while you’re sleeping.
So that’s seven skills. All learnable in under 10 minutes each.
And between the HVAC filter, the toilet flapper, the drain unclogging, and not having to call someone for a tripped breaker or a loose handle, you just saved yourself roughly $800 to $1,200 in annual service calls.
Not bad for an afternoon.
3. Repairs That Feel Bigger Than They Are
There’s this gap that feels real but mostly isn’t, the one between “stuff I can do” and “stuff I need to hire someone for.”
The skills in this section live right in that gap. They sound like “real” repairs that “real” handy people do. I put off learning every single one of them for exactly that reason.
But once I actually tried them, usually after watching one YouTube video and just going for it, they were never as scary as they’d felt sitting on my to-do list.
You might mess up a little. That’s fine. None of these will flood your house or start a fire if you get it slightly wrong. That’s actually how I picked them.
3.1 Patch a Small Hole in Drywall
Whether it’s a nail hole from a picture frame, a doorknob that punched through the wall, or just a mysterious dent that was there when you moved in, this is one of the most satisfying repairs you’ll ever do.
Because you go from “damaged wall” to “wait, where was the hole?” in like 20 minutes.
For small nail holes and dents: Get a tub of spackle and a putty knife from the hardware store. Both together will run you like $8.
Scoop a little spackle onto the knife, press it into the hole, scrape it flat. Let it dry for an hour or so. Sand it lightly with a piece of sandpaper or even a dry paper towel. Paint over it. Gone.
For bigger holes (like fist-sized or doorknob-sized): Get a mesh drywall patch kit. Also, about $8 to $12.
You stick the mesh patch over the hole, apply spackle over the mesh in thin layers, let each layer dry, sand it smooth, and paint. It’s the same process, just with one extra step.
Renter tip: This is literally how you get your security deposit back. A $10 repair kit versus losing $200 from your deposit. Worth it.
3.2 Recaulk a Bathtub or Sink
If the caulk around your tub or sink is peeling, cracking, or turning black with mold, it’s not just ugly. It’s letting water get behind your walls.
And water behind walls is how you end up with mold problems, rotting wood, and repair bills that start at $500 and go way up from there.
The good news is that recaulking is genuinely not hard. It’s just a little messy your first time.
The process:
- Pull out the old caulk with a utility knife or a cheap caulk removal tool
- Clean the area with rubbing alcohol and let it dry completely
- Load a tube of kitchen/bath silicone caulk into a caulk gun (caulk gun is like $5, tube of caulk is another $5 to $8)
- Cut the tip of the caulk tube at an angle, squeeze a steady line along the seam
- Wet your finger and smooth it out in one continuous stroke
Your first line will probably be a little uneven. That’s totally normal. It still works. And by your second or third time doing this, you’ll be weirdly good at it.
3.3 Hang Shelves or Mount Something Heavy on a Wall
This is the one where people mess up, and it’s always for the same reason. They skip the stud finder.
Your walls are mostly hollow drywall. Behind the drywall, there are vertical wooden beams called studs, spaced about 16 inches apart.
If you screw something heavy into just the drywall, it’s going to rip out and fall. Maybe not today, but eventually. And it’ll take a chunk of your wall with it.
A stud finder costs about $20. You hold it flat against the wall, slide it horizontally, and it beeps or lights up when it hits a stud. That’s where you want your screws to go.
If you can’t hit a stud where you need your shelf (it happens), use drywall anchors.
They spread the weight across a bigger area of the wall. The ones rated for 50+ pounds are surprisingly strong.
You need three tools for this: Stud finder, level (so your shelf isn’t crooked, which will bother you forever), and a drill. That’s it. Those three tools together unlock a huge amount of independence in your home.
3.4 Paint a Room
Painting is one of those things that seems simple, but where the prep work is honestly 80% of the job.
If you prep well, the actual painting part is easy and even kind of relaxing. If you skip the prep, you’ll hate every minute of it, and the result will look rough.
The prep:
- Move furniture to the center and cover it with a drop cloth or old sheets
- Tape off the edges of trim, windows, and ceiling with painter’s tape (do not skip this step thinking you have steady hands, you don’t, nobody does)
- Fill any nail holes with spackle (you just learned how to do this)
- Wipe down the walls if they’re dusty or greasy
The painting:
- Cut in first. That means using a brush to paint the edges and corners where a roller can’t reach
- Then use the roller for the big flat areas. Load it up, roll off the excess on the tray, and use long up-and-down strokes
- Two coats minimum. It’ll look patchy after the first coat. That’s normal. Don’t panic
Solo tip: Start with your bathroom. It’s small, it’s forgiving, and you’ll finish it in a few hours. That win will give you the confidence to tackle the living room later.
3.5 Replace a Toilet Fill Valve or Handle
If your toilet keeps running even after you’ve replaced the flapper, the problem might be the fill valve. That’s the tall thing inside the tank that controls the water level.
This sounds way more serious than it is.
Here’s the process:
- Shut off the water valve behind the toilet (turn it clockwise)
- Flush the toilet to empty the tank
- Unscrew the old fill valve from the bottom of the tank
- Put the new one in following the instructions in the box
- Turn the water back on and let the tank fill
The replacement part costs about $10 to $15 at any hardware store. A plumber would charge you $150 to $250 for this exact same job.
And the instructions that come in the box are honestly pretty good these days, often with pictures.
Same thing for a broken flush handle. It’s just a nut on the inside of the tank. Unscrew the old one, screw in the new one. Five minutes.
3.6 Weatherstrip a Drafty Door or Window
If you can feel cold air coming in around your front door or windows in winter, you’re basically heating the outdoors and paying for the privilege.
Weatherstripping is the fix, and it’s one of the cheapest, easiest upgrades you can make.
Go to the hardware store and get self-adhesive foam weatherstripping tape. It’ll cost you $5 to $10 for a roll.
Clean the surface where you’re going to stick it (around the door frame or window frame where it closes against). Peel off the backing. Press it into place. Close the door or window to make sure it compresses evenly.
That’s the whole job. It can cut your energy bills by 10 to 15% on drafty doors and windows, which for most people is like $15 to $30 a month in winter. The tape pays for itself in the first month.
Here’s what I want you to notice.
None of these required special training. None of them required expensive tools. And none of them are things you could only learn by growing up in a house with someone who taught you.
You just needed someone to tell you it wasn’t as hard as it looked. So I’m telling you. It’s not as hard as it looks.
Every one of these is a skill you learn once and have forever. And every time you do one, the next one feels a little less scary. That’s how this works.
You don’t wake up one day, and suddenly you’re “handy.” You just keep doing small things until one day you realize you haven’t called anyone for help in six months.
That day is coming faster than you think.
4. When to DIY and When to Call a Pro
I need to say something honestly.
Sometimes you should NOT do it yourself.
Sometimes the smartest, most capable thing you can do is pick up the phone and pay someone who does this for a living. That’s not failing. That’s just being realistic about where your time, energy, and money are better spent.
I learned this the hard way when I tried to install a ceiling fan by myself because a YouTube video made it look easy. I’ll spare you the full disaster, but it involved a tripped breaker, a very heavy fan hanging by one wire, and me standing on a wobbly chair having a genuine moment of crisis.
I called an electrician the next day. He fixed it in 45 minutes.
I should’ve done that from the start.
So how do you actually know when to handle something yourself and when to call someone?
I use five questions.
If the answer to any one of them is yes, I call a pro.
4.1 The Five Questions
Could I hurt myself if I mess this up?
If a mistake could cause injury, flooding, fire, or electrical shock, that’s a professional job. No amount of savings is worth a trip to the ER.
Does the law require a licensed person?
Electrical panel work, gas line repairs, and structural changes almost always require a licensed professional in most states.
This isn’t optional. If unpermitted work causes a problem later, your insurance might not cover it.
Can I undo it if I get it wrong?
Painting a wall the wrong color? You can repaint it. Cutting a pipe too short? You can’t uncut a pipe.
If the mistake is permanent and expensive to fix, think carefully.
Is the cost of messing up way more than the cost of hiring?
If a plumber charges $200 for a job, but messing it up yourself could cause $5,000 in water damage, that’s not a gamble worth taking.
Would I need to buy a bunch of tools I’ll only use once?
If you need $400 worth of specialized tools for one job you’ll never do again, it’s cheaper to just hire someone.
Save your money for tools you’ll actually use regularly.
4.2 Always Safe to DIY
These are the jobs where you really can’t cause serious damage even if you mess up. Go for it:
- Changing HVAC filters, smoke detector batteries, showerheads
- Unclogging drains with a plunger or baking soda and vinegar
- Fixing a running toilet (flapper, fill valve, handle)
- Patching small drywall holes and recaulking
- Painting walls, hanging shelves (with a stud finder)
- Weatherstripping doors and windows
- Tightening loose hardware, oiling squeaky hinges
- Cleaning gutters on a single story home
Basically, everything we’ve already covered in this guide. You’re good.
4.3 Always Call a Pro
These are non-negotiable. I don’t care how good the YouTube tutorial looks.
- Anything involving your electrical panel or breaker box. Resetting a tripped breaker is fine. Opening the panel and touching wires is not.
- Gas line work. Any of it. All of it. No exceptions.
- Structural changes. Removing or modifying walls, floor joists, support beams. Just don’t.
- Roof repairs beyond sticking down a loose shingle
- Major plumbing like replacing pipes, moving fixtures, or anything involving your main sewer line
- HVAC installation or major repairs
- Anything that requires a permit in your city or state
4.4 The Gray Zone
These are the “depends on your comfort level” jobs.
Totally doable yourself if you’ve built up some confidence, but also completely reasonable to hire out:
- Replacing a light fixture (turn off the breaker first, always)
- Replacing a kitchen or bathroom faucet
- Installing a ceiling fan (learn from my mistakes)
- Cleaning a really long dryer vent
- Replacing a toilet (it’s heavy and awkward, but not technically complicated)
- Minor drywall repairs bigger than a fist
No judgment either way on these. If you want to try one, watch two or three YouTube videos from different people first, not just one.
If the job still feels over your head after that, call someone. That’s a perfectly good system.
4.5 How to Hire a Pro Without Getting Ripped Off
Let’s talk about this. Because I know this is a real thing for a lot of us.
There’s this specific experience that many women have had where you call a repair person, they come to your house, look around, look at you, and suddenly the quote is way higher than it should be.
Or they explain the problem to you like you’re five years old.
Or they talk to your boyfriend or husband instead of you, except you don’t have one because you live alone, and that somehow makes it worse.
I’ve had a painter literally tell me he overcharged me. To my face. So yeah, I get it.
Here’s what actually works:
Get three quotes, Always
This is your single best defense against being overcharged.
When you have three numbers to compare, you can immediately spot the outlier.
It also signals to contractors that you’re doing your homework, which tends to keep prices honest.
Research what the job should cost before you call anyone
Just Google “average cost to [whatever the job is] in [your city].” Angi, HomeAdvisor, and even just Reddit threads will give you a ballpark.
When you walk into the conversation already knowing that a water heater replacement should cost around $1,200 to $2,000, nobody can quote you $4,000 with a straight face.
Get written estimates, not verbal ones
Always. If someone won’t put a number in writing, that tells you something.
Trust your gut
If someone is condescending, dismissive, or makes you feel uncomfortable in your own home, they don’t deserve your money.
Thank them for their time and call the next person on your list. You don’t owe anyone an explanation.
Tell someone when a contractor is coming
Text a friend the company name, the person’s name if you have it, and when they’re expected.
Not because something bad will happen. Just because it’s a smart habit when you live alone, and someone you don’t know is coming into your space.
Knowing when to call someone isn’t failure. It’s the most advanced home maintenance skill there is.
I still call pros regularly. The difference between me now and me seven years ago isn’t that I fix everything myself. It’s that I know what I’m looking at.
I can describe the problem accurately. I can tell when a quote is fair. And I don’t panic anymore.
That’s the real skill. And you’re building it right now.
5. If You Rent: Know Your Boundaries
I’ve been a renter for most of my time living alone, and one of the most confusing parts is figuring out who is responsible for what.
Your toilet is running. Is that your problem or your landlord’s? The caulk in your shower is moldy. Are you supposed to fix that?
The short version: you handle the small daily stuff (lightbulbs, HVAC filters, smoke detector batteries, minor drain clogs, keeping the place clean).
Your landlord handles the big stuff (major plumbing, electrical issues, HVAC repairs, structural problems, appliance failures for appliances they provided).
The most important thing I can tell you is this: always report issues in writing.
Email or text, not just a phone call. Take photos with dates. Because if things get worse and there’s a dispute about your deposit or liability, you need a paper trail that proves you told them.
I wrote a whole separate guide on this because renters get ignored by basically every home maintenance article on the internet, and I think that’s ridiculous. It covers your responsibilities vs. your landlord’s in detail, the gray zone stuff, how to document and report issues, your legal rights, and renter-specific tools that make life easier without modifying anything.
Read next: What Your Landlord Is Responsible for (and What You Are)
6. Your Starter Toolkit
When I moved into my first apartment, my entire toolkit was a butter knife I used as a screwdriver and a shoe I used as a hammer.
I’m not proud of this, but I’m also not going to pretend it didn’t work for longer than it should have.
You don’t need to spend $500 at Home Depot.
You need about $75 to $150 worth of actual basics, and you need to buy them BEFORE something breaks. Not after, when you’re standing in your kitchen at midnight, realizing you don’t own a wrench.
The essentials:
- a screwdriver set with magnetic tips
- an adjustable wrench
- pliers (needle-nose and regular)
- a claw hammer
- a tape measure
- a utility knife
- an LED headlamp (trust me on this one)
- two plungers (one for sinks, one for toilets, they’re different)
- and a torpedo level
Skip the pink tool sets. They’re miniature, they’re flimsy, and they’re patronizing. Buy real tools that fit your hands.
Once you’re ready to level up, a cordless drill will change your life.
I’m not being dramatic. It’s the single most useful tool I’ve ever bought.
7. Seasonal Maintenance
I keep a version of this on my fridge. Not a fancy one. Just the stuff that actually matters, organized by when to do it.
Every month: Change your HVAC filter, clean the dryer lint trap, test your smoke detectors, pour baking soda and vinegar down slow drains. Fifteen minutes total.
Spring: Clean gutters, schedule an HVAC tune-up, walk your exterior looking for winter damage, test your sump pump if you have one.
Fall (the big one): Winterize your outdoor faucets (this free, 10-minute task prevents the average $11,605 burst pipe claim), get your furnace serviced, insulate exposed pipes, clean the dryer vent, check weatherstripping.
Summer: Check for leaks under sinks, inspect washing machine hoses, clean fridge coils.
Winter: Keep thermostat at 55+ when traveling, open cabinet doors under sinks during extreme cold, use it as your indoor project season.
8. Safety When You Live Alone
Everything else in this guide is about fixing stuff and maintaining stuff.
But there’s a layer on top of all of it that matters more when you’re the only person in the house.
When something goes wrong at 3 AM, there’s no one else to smell the gas, hear the water, notice the smoke, or call for help.
That’s not meant to scare you. It’s just the reality, and having a plan for it makes you less anxious, not more.
The quick version:
- Know your warning signs. New water stains on the ceiling mean an active leak. A burning smell near outlets is an electrical hazard. A musty smell in closed spaces is mold. A hissing sound near gas appliances means leave immediately and call from outside
- Keep an emergency contact list somewhere physical. Landlord emergency line, gas/electric/water companies, a 24-hour plumber and electrician, a neighbor with your spare key. On your fridge, not just in your phone
- Keep a screwdriver in your bathroom. If the door handle jams while you’re inside with no phone, this gets you out. It went viral on Reddit for a reason
- Two fire extinguishers. One in the kitchen, one near the bedroom. Sleep with your door closed (it buys you critical minutes in a fire)
- Keep your phone charged. Especially at night. Keep a power bank in your nightstand
Read next: Safety Tips for Women Living Alone: A Real-Life Guide
9. Where to Learn More
I didn’t learn any of this from a class.
I learned it from YouTube at midnight, Reddit threads where strangers were weirdly generous, and a lot of trial and error.
Here’s who I trust:
See Jane Drill on YouTube. About 1.1 million subscribers, over 25 years experience, Reddit’s top recommendation for women learning home repair. She doesn’t skip steps, and she doesn’t talk down to you.
Mercury Stardust on TikTok (@mercurystardust). 2.6 million followers, invented what she calls “Compassionate DIY.” Especially good for renters. Her book Safe and Sound is a New York Times bestseller and the only popular repair guide written specifically for renters.
This Old House on YouTube. Been around forever, still the best for understanding WHY you’re doing something, not just the steps.
Dare to Repair by Julie Sussman and Stephanie Glakas-Tenet. Written by two women whose husbands were literally never home. The tone is perfect. It’s like getting instructions from a friend over the phone.
r/HomeImprovement on Reddit. Post a photo of your problem, and you’ll get genuinely helpful responses from people who don’t judge beginners.
And honestly? Take a photo of whatever is broken and ask ChatGPT or Claude what it is.
It sounds funny in a home maintenance guide, but it’s genuinely useful for identifying parts and figuring out if something is a DIY fix or a pro job.
You Were Never Taught This. Now You Know.
Remember the faucet? The one dripping at 1 AM while I stood in my pajamas calling my mom?
That was seven years ago. And I still have moments where something breaks, and my first instinct is to freeze.
That doesn’t fully go away, I think.
But what’s different now is that the freeze only lasts a second. Then my brain switches from “who do I call” to “ok, what am I looking at.”
That’s the shift. That’s the whole thing.
I’m not a contractor. I’m not especially handy. I still call professionals for plenty of stuff, and I don’t feel bad about it.
But I know what a tripped breaker looks like. I know where my water shutoff is. I know that a running toilet is a $5 fix and not a reason to panic. I know when a contractor’s quote is fair and when someone is trying to take advantage of me.
And I know all of that because I learned it. One thing at a time. Usually at an inconvenient hour. Usually, while slightly annoyed that nobody had shown me sooner.
You don’t need to learn everything in this guide today. You really don’t.
If you do one thing, go find your water shutoff valve. Test it. Take a photo. That alone puts you ahead of most people.
Then next weekend, try one of the quick wins.
- Change a filter
- Fix a running toilet
- Replace a showerhead
Whatever feels doable. And notice how it feels when you’re done. Not like you just saved $150, even though you did.
But like your home just became a little more yours. Like you understand it a little better. Like you and this place have an understanding now.
That’s the feeling I want for you. Not the “I am woman, hear me roar” kind of empowerment. Just the quiet kind. The kind where something breaks, and you think, “ok, I can handle this.” And then you do.
Six months from now, you’re going to have a moment. Someone is going to ask you how you knew how to do something, fix a leak, patch a wall, replace something, and you’re going to shrug and say, “I don’t know, I just figured it out.”
And you won’t even remember that there was a time when you couldn’t.
That’s coming. Sooner than you think.
Bookmark this guide. You’ll want it at 2 AM on a random Tuesday.
I’ll be here.